


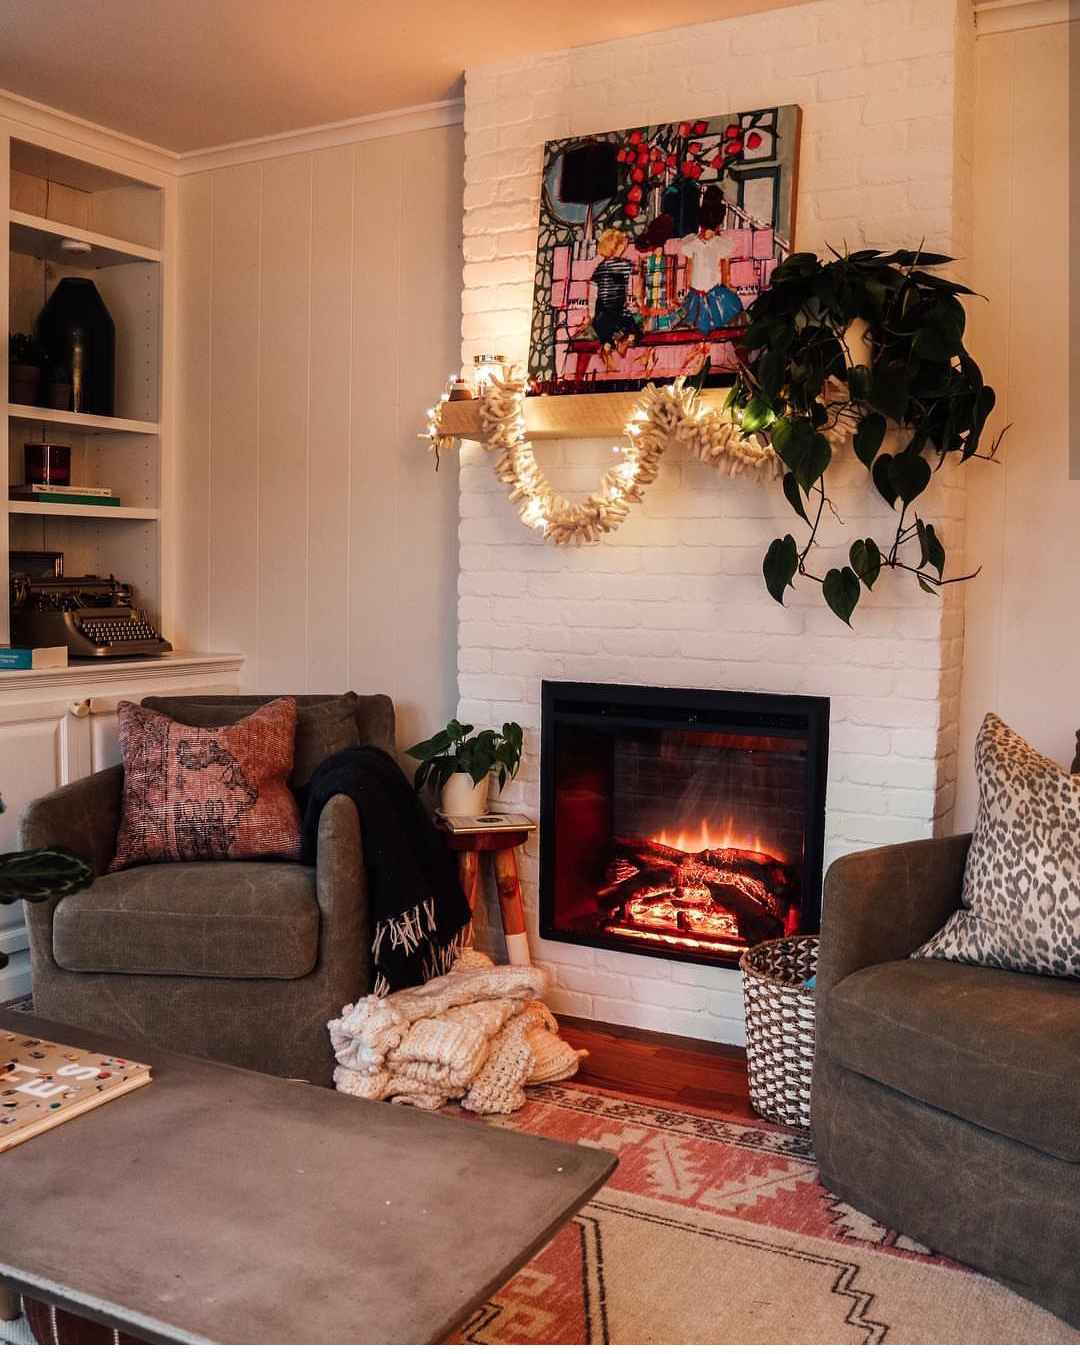
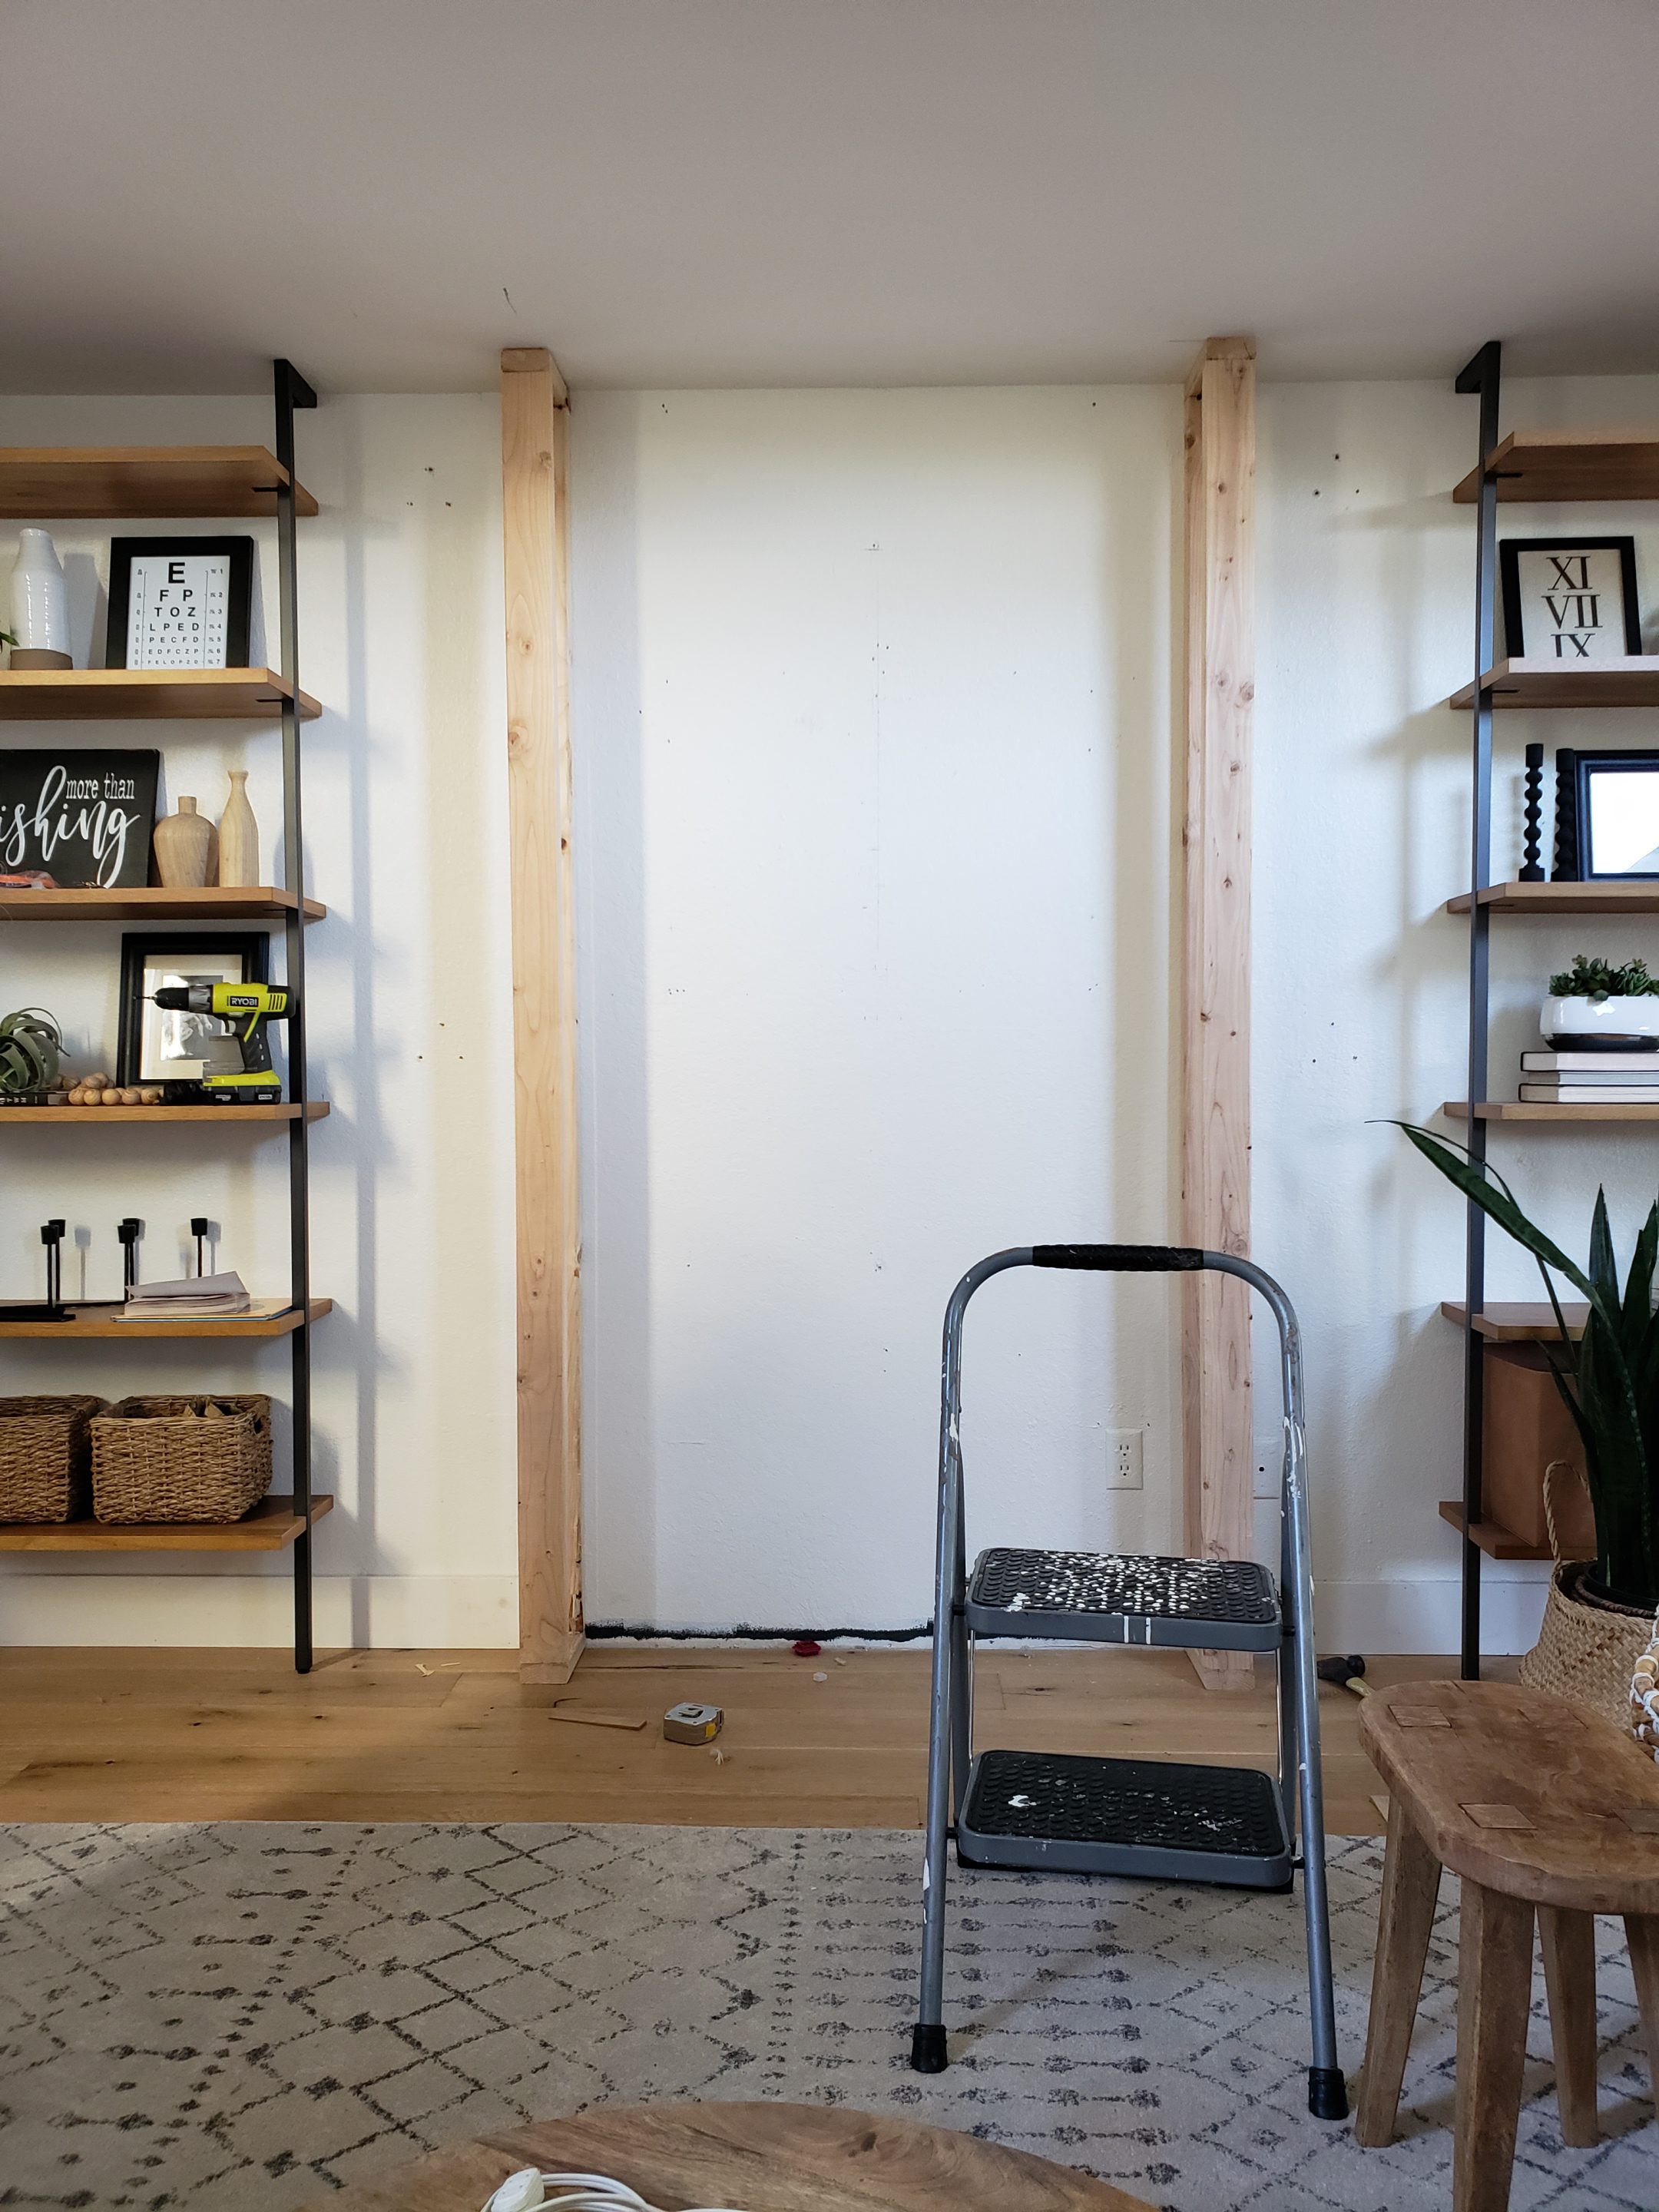
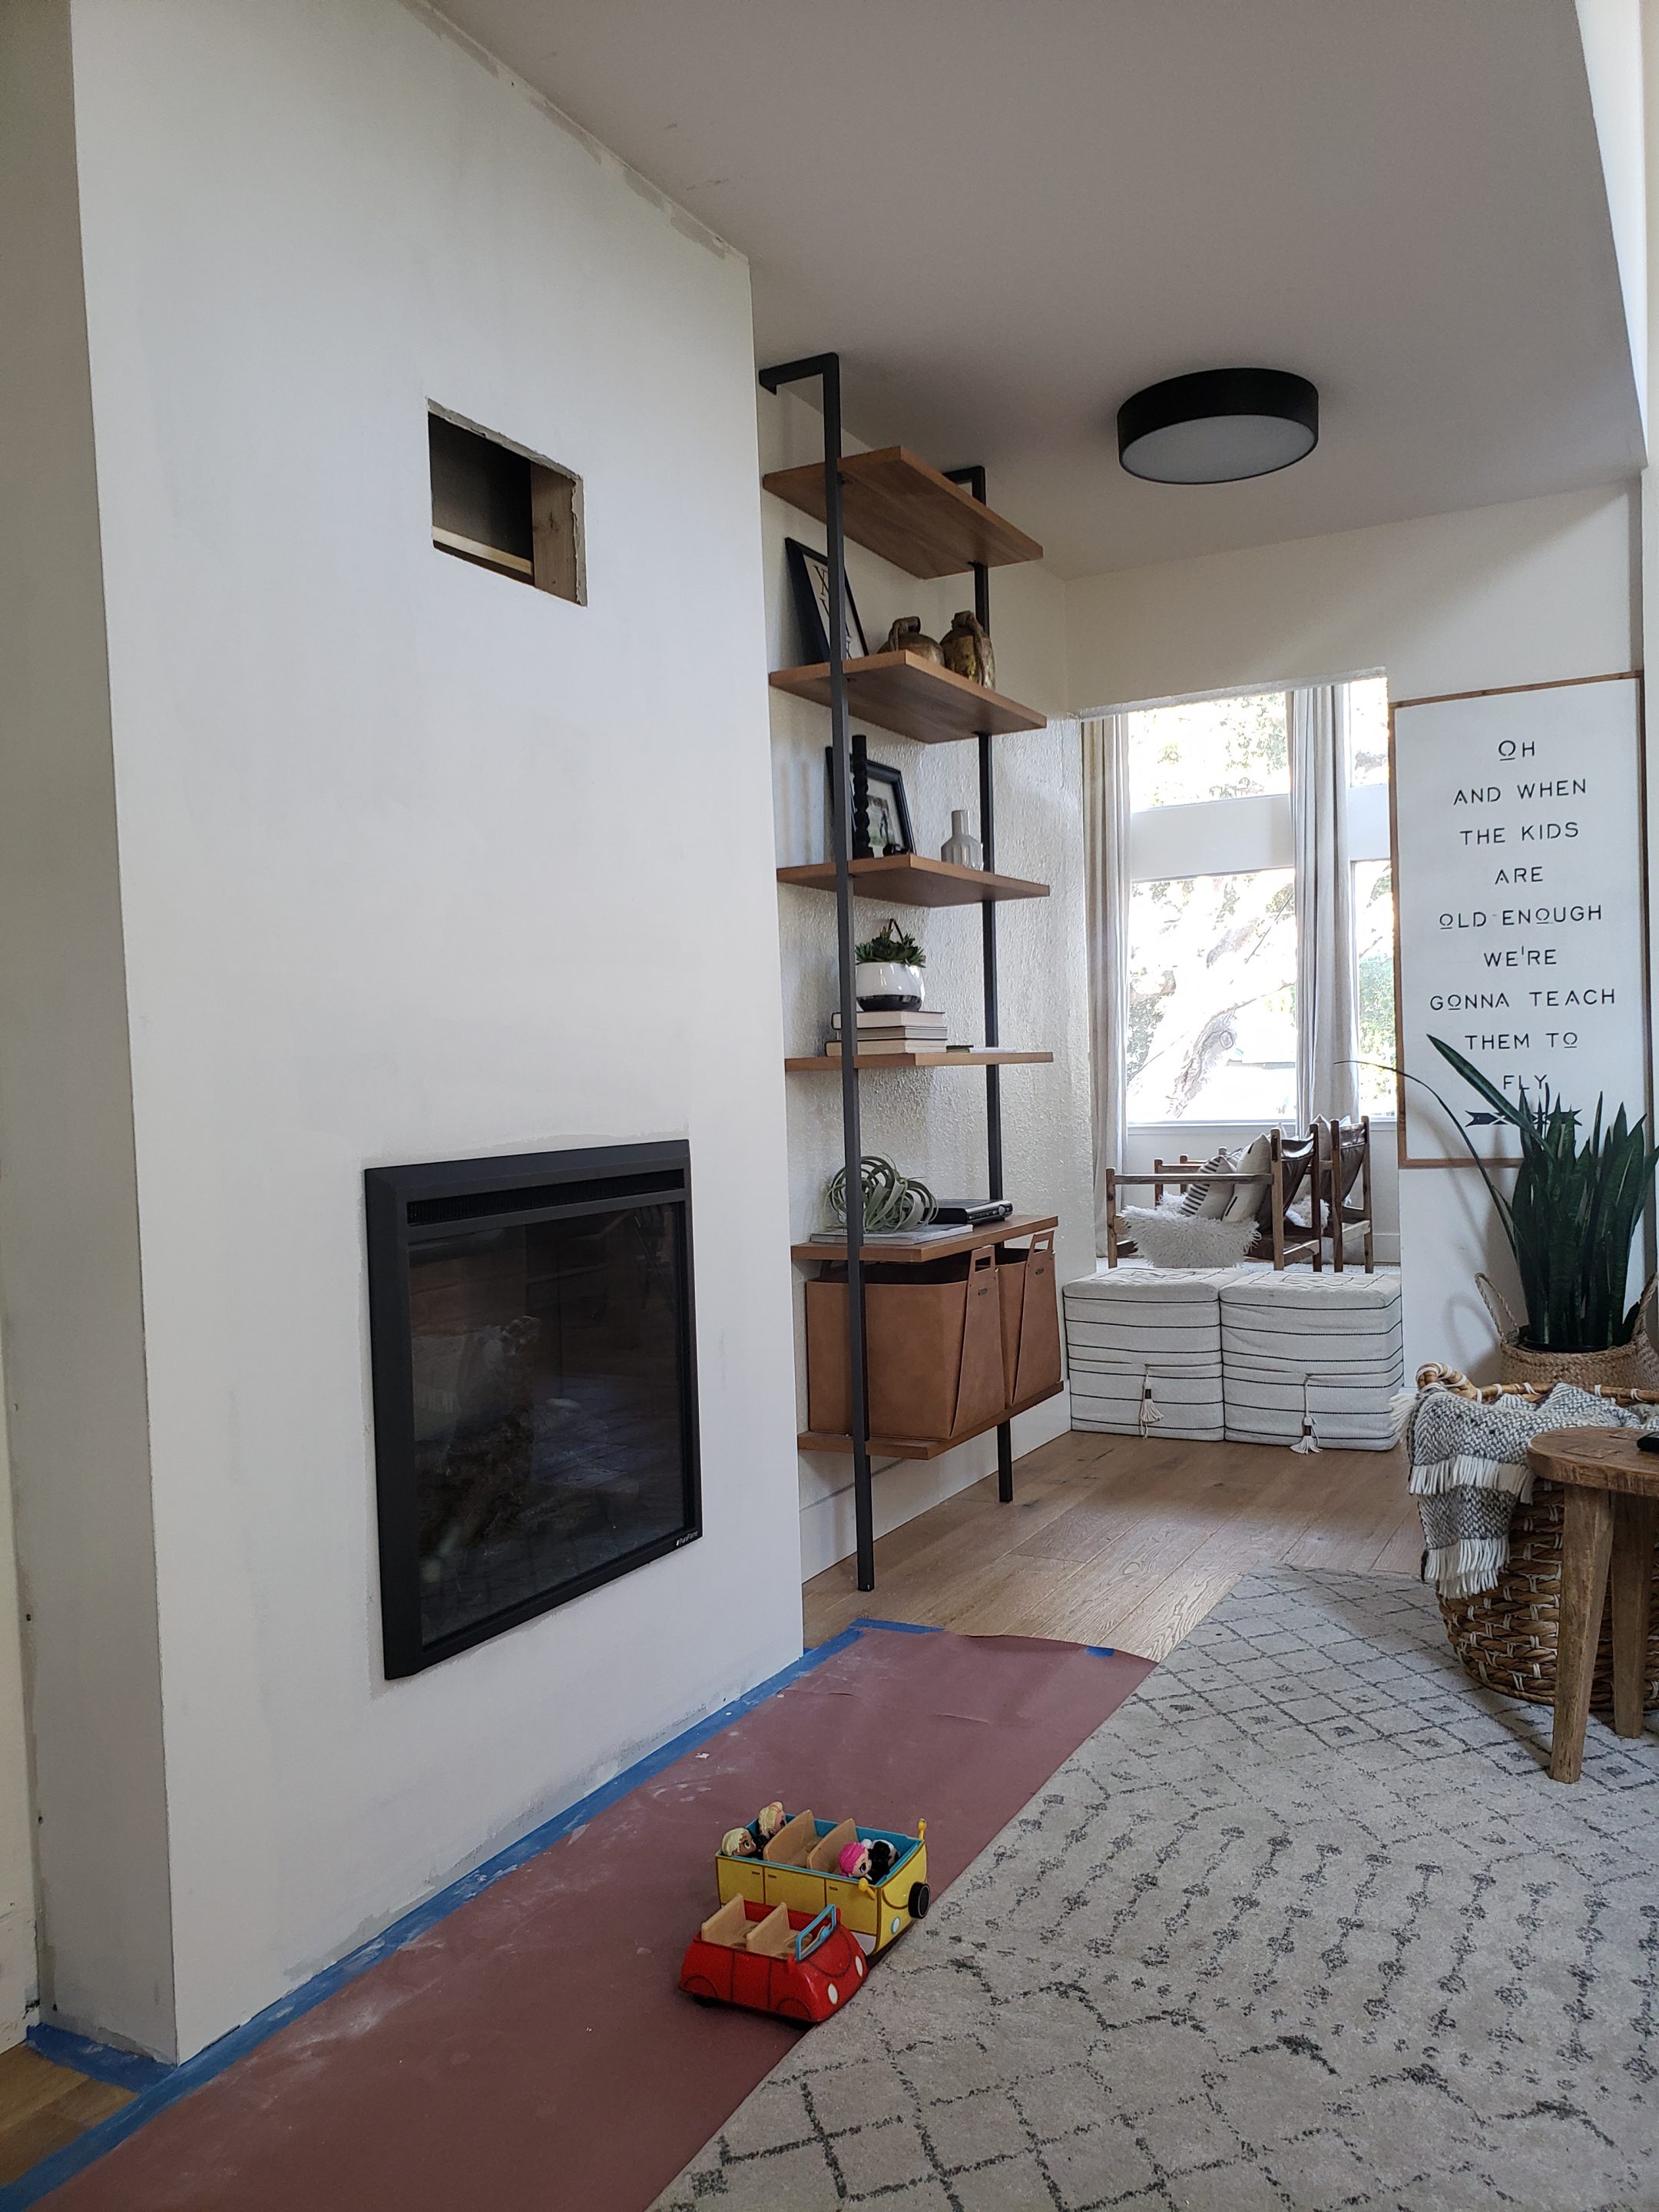
The DIY Electric Fireplace tutorial and reveal is here!!! Hooray! But before we get down to the meat and potatoes of “How-To” let us first take a minute to appreciate the where we started. Where we were just 1 week ago and what it looks like today. It’s a short stroll down memory lane worth taking, I promise.
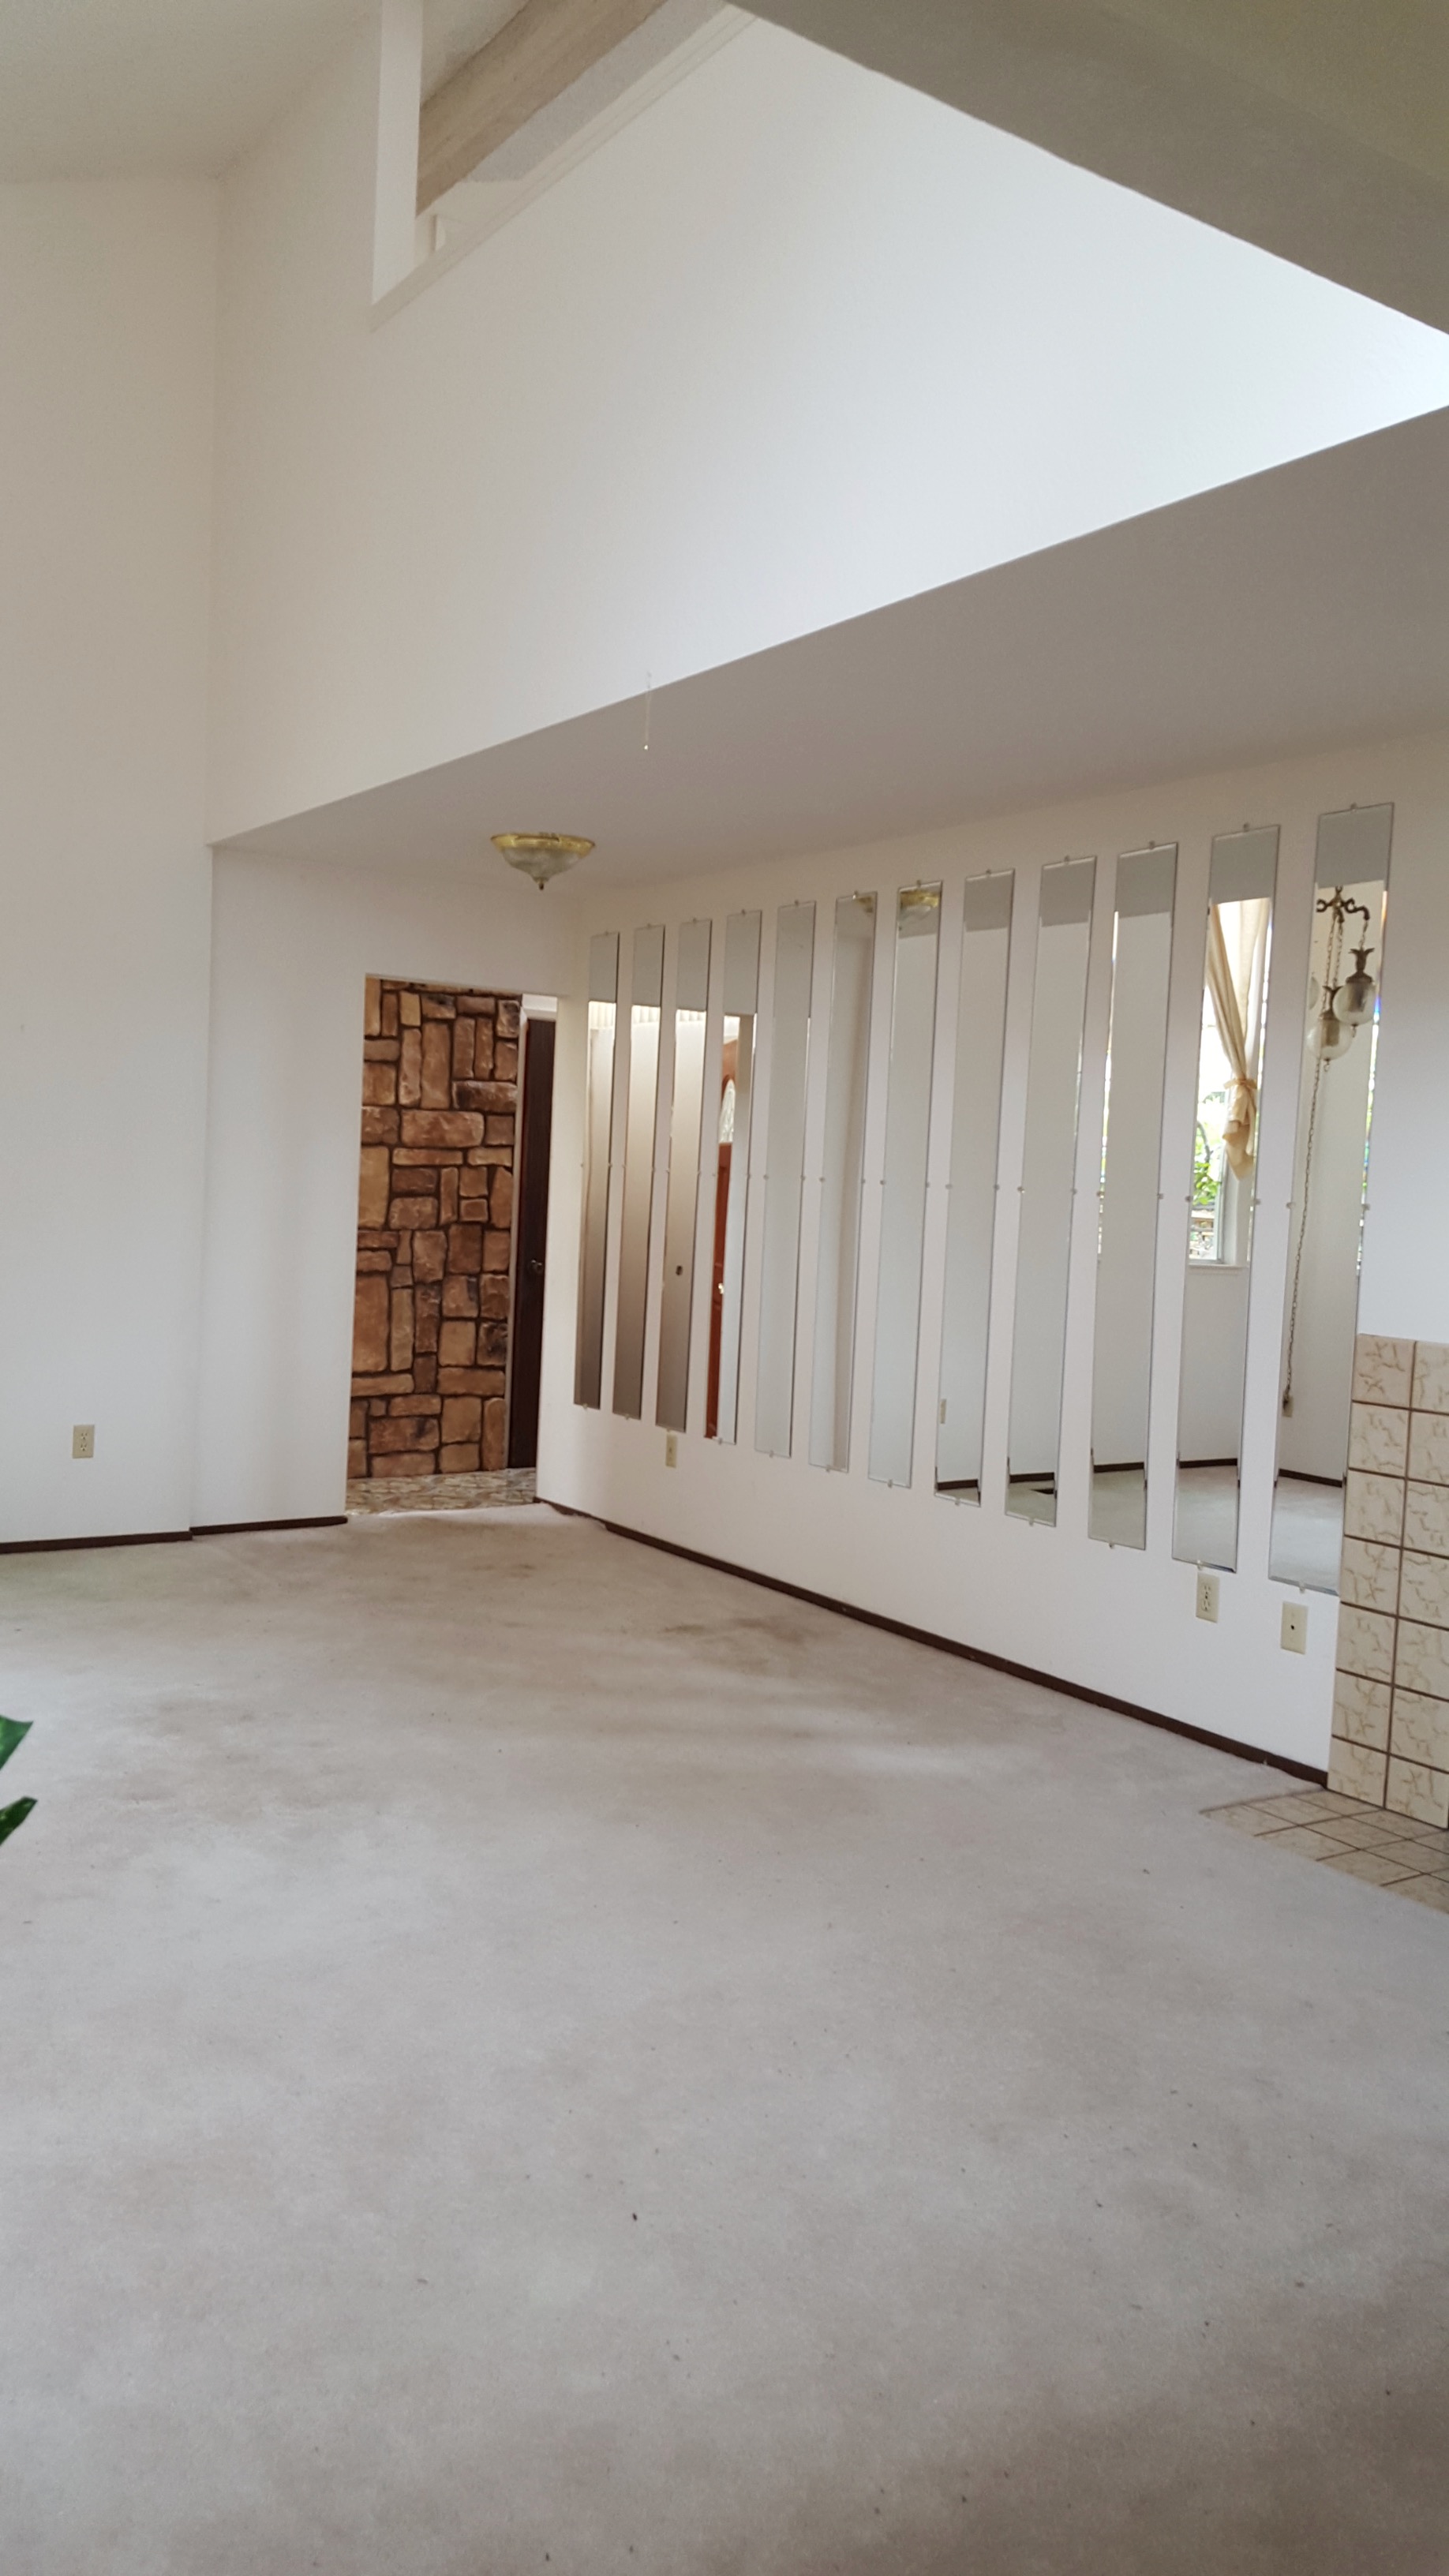
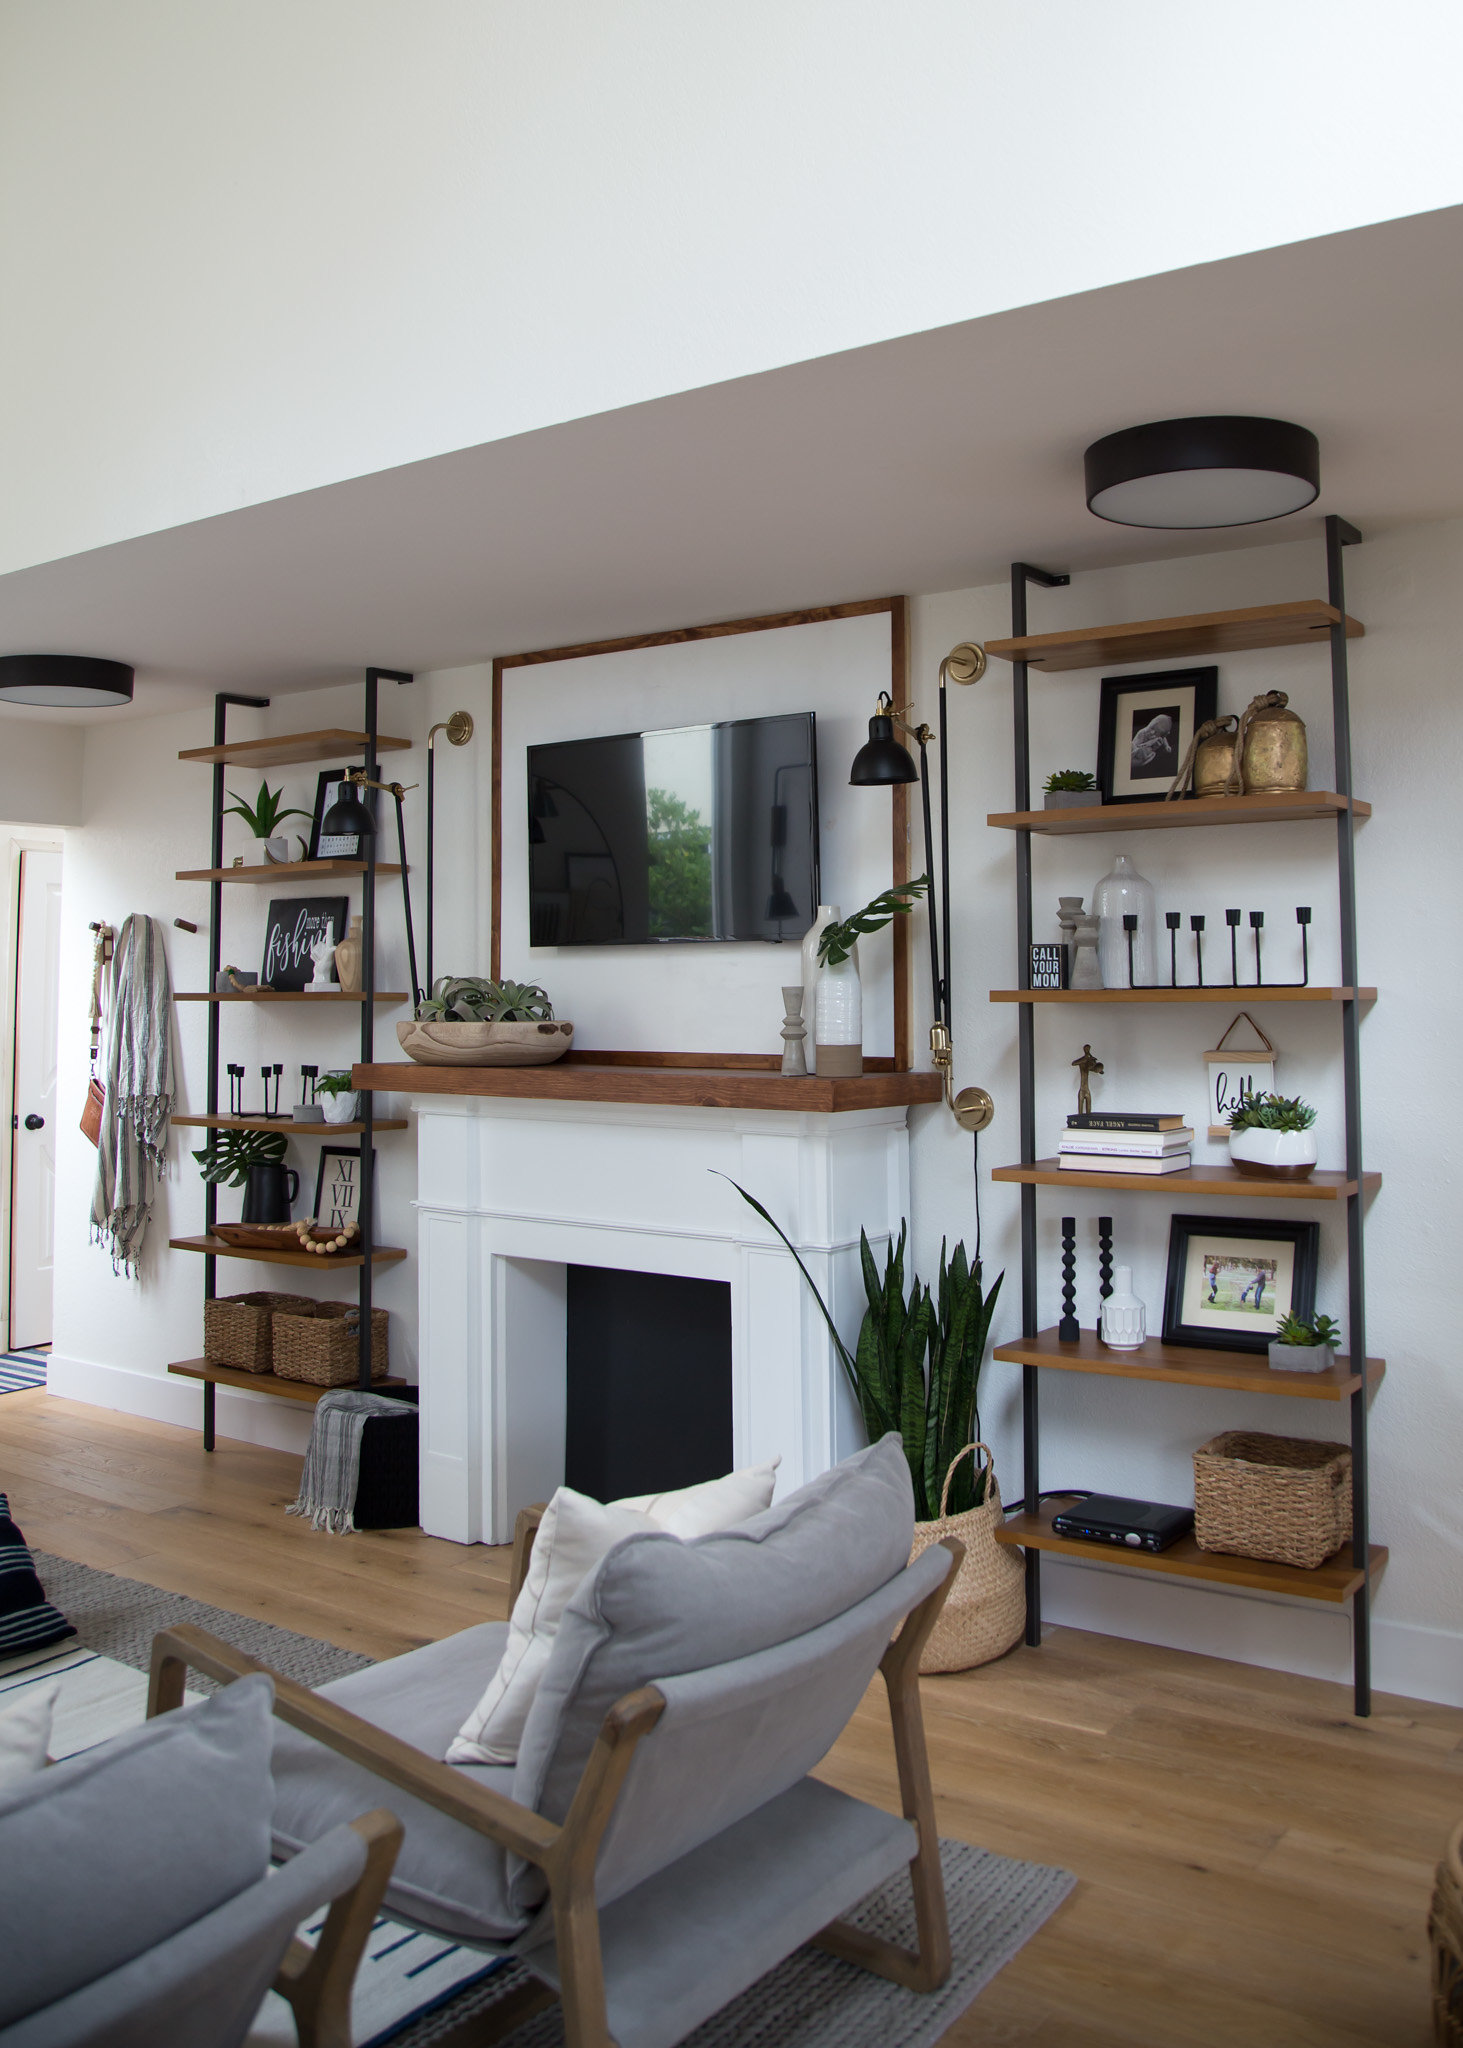
 DO YOU DIE!!! Is that transformation not AMAZING… are you not entertained!?!
Okay Im clearly excited. I’ll calm down now, sorry. Im just really pumped with the outcome. It’s so pretty…
I also want to make sure to shout out Brooke @NestingWithGrace for giving me the ammo needed to convince my husband that electric fireplaces have come a very long way, and are no longer the cheesy eyesore of yesteryear. You’re the real MVP. Look at her gorgeous build is below.
 So good right!? Anyway, after Brooke sold my hubby on the idea for me (hehehe) I had to narrow down my fireplace inspo and kept coming back to this one designed by @housesevendesign.

It is clean, crisp but still feels warm and it just spoke to me. Now I was sold on design and my boo thang was sold on the concept… so off we go!
Now for the build. The first, and arguably most important step to the build was selecting the right electric insert for us. This insert would provide us the jumping off point for how to execute the vision, scale and dimensions of our fireplace surround. We selected a PuraFlame 26 inch square fireplace. Square because, well… that is the insert shape from my inspo home, and I just like the timeless shape of a square insert. It feels more traditional to me and helps keep the overall vibe in our space from being cold. We decided from there to build the surround out to 54 inches. The fireplace needed 8 inches for depth, we gave it and extra half an inch for some wiggle room. The full footprint is 54 wide by 8.5 deep, so super low profile and sexy as hell. With our plan in place of 54 inches wide and 8.5 inches deep, floor to ceiling, we were off to the races. *note the tutorial below is based on our exact build*
Also we lucked out and had an outlet that was in the perfect spot, so we didn’t have to do any electrical work. If you are not so lucky, we suggest finding a qualified electrician to get you set up with an outlet inside your framing. Electrical is not a job for a hobby handyman/woman.
SHOPPING LIST:
1- PuraFlame 26 inch electric insert
1- Midwood Designs fireplace mantel in rustic walnut
13- 2×4’s each 8 feet long (we opted for kiln dried to avoid any warping or settling)
1- box of 2.5 inch general purpose wood screws
1- box of 1 3/8 inch sheetrock nails
2- pieces of metal corner beading for the drywall
2- quarts paint and primer in 1 (we used Ultra Pure White by Behr)
1- 1×8 common board (for component shelf)
Total Cost- $521.00
We did also purchase a 43 inch Samsung Frame TV with walnut bezel. That was a pretty penny. We did not include this cost in the budget because you do not have to get The Frame TV for your own electric fireplace build. However, budget permitting, we highly recommend them, they are mind blowing.
FRAMING:
First draw out the lines on your walls and floor (using a contractors pencil) to line your framing up against. This is a time saver so you don’t have to keep measuring. PRO TIP: Be mindful that the project will “grow” about an inch in width when you add the layers, i.e. sheetrock, tape, spackle, paint. Meaning we drew our lines on the wall at 53 inches apart so the end result would be 54 inches wide.
- We took one 2×4 and cut 4- 8 inch lengths off of the 2×4. These 8 inch pieces will be the top and bottom plates of the side walls. Also cut 2- 4 3/4 inch lengths from the 2×4. These 4 3/4 inch pieces will be for the supports.
- We measured the height of our wall, floor to ceiling. Then subtracted 3 1/4 inches from that ceiling height to determine our stud height. Then took 4 of our full length 2×4’s and cut them down to size. For us “to size” is 92 3/4 inch lengths.
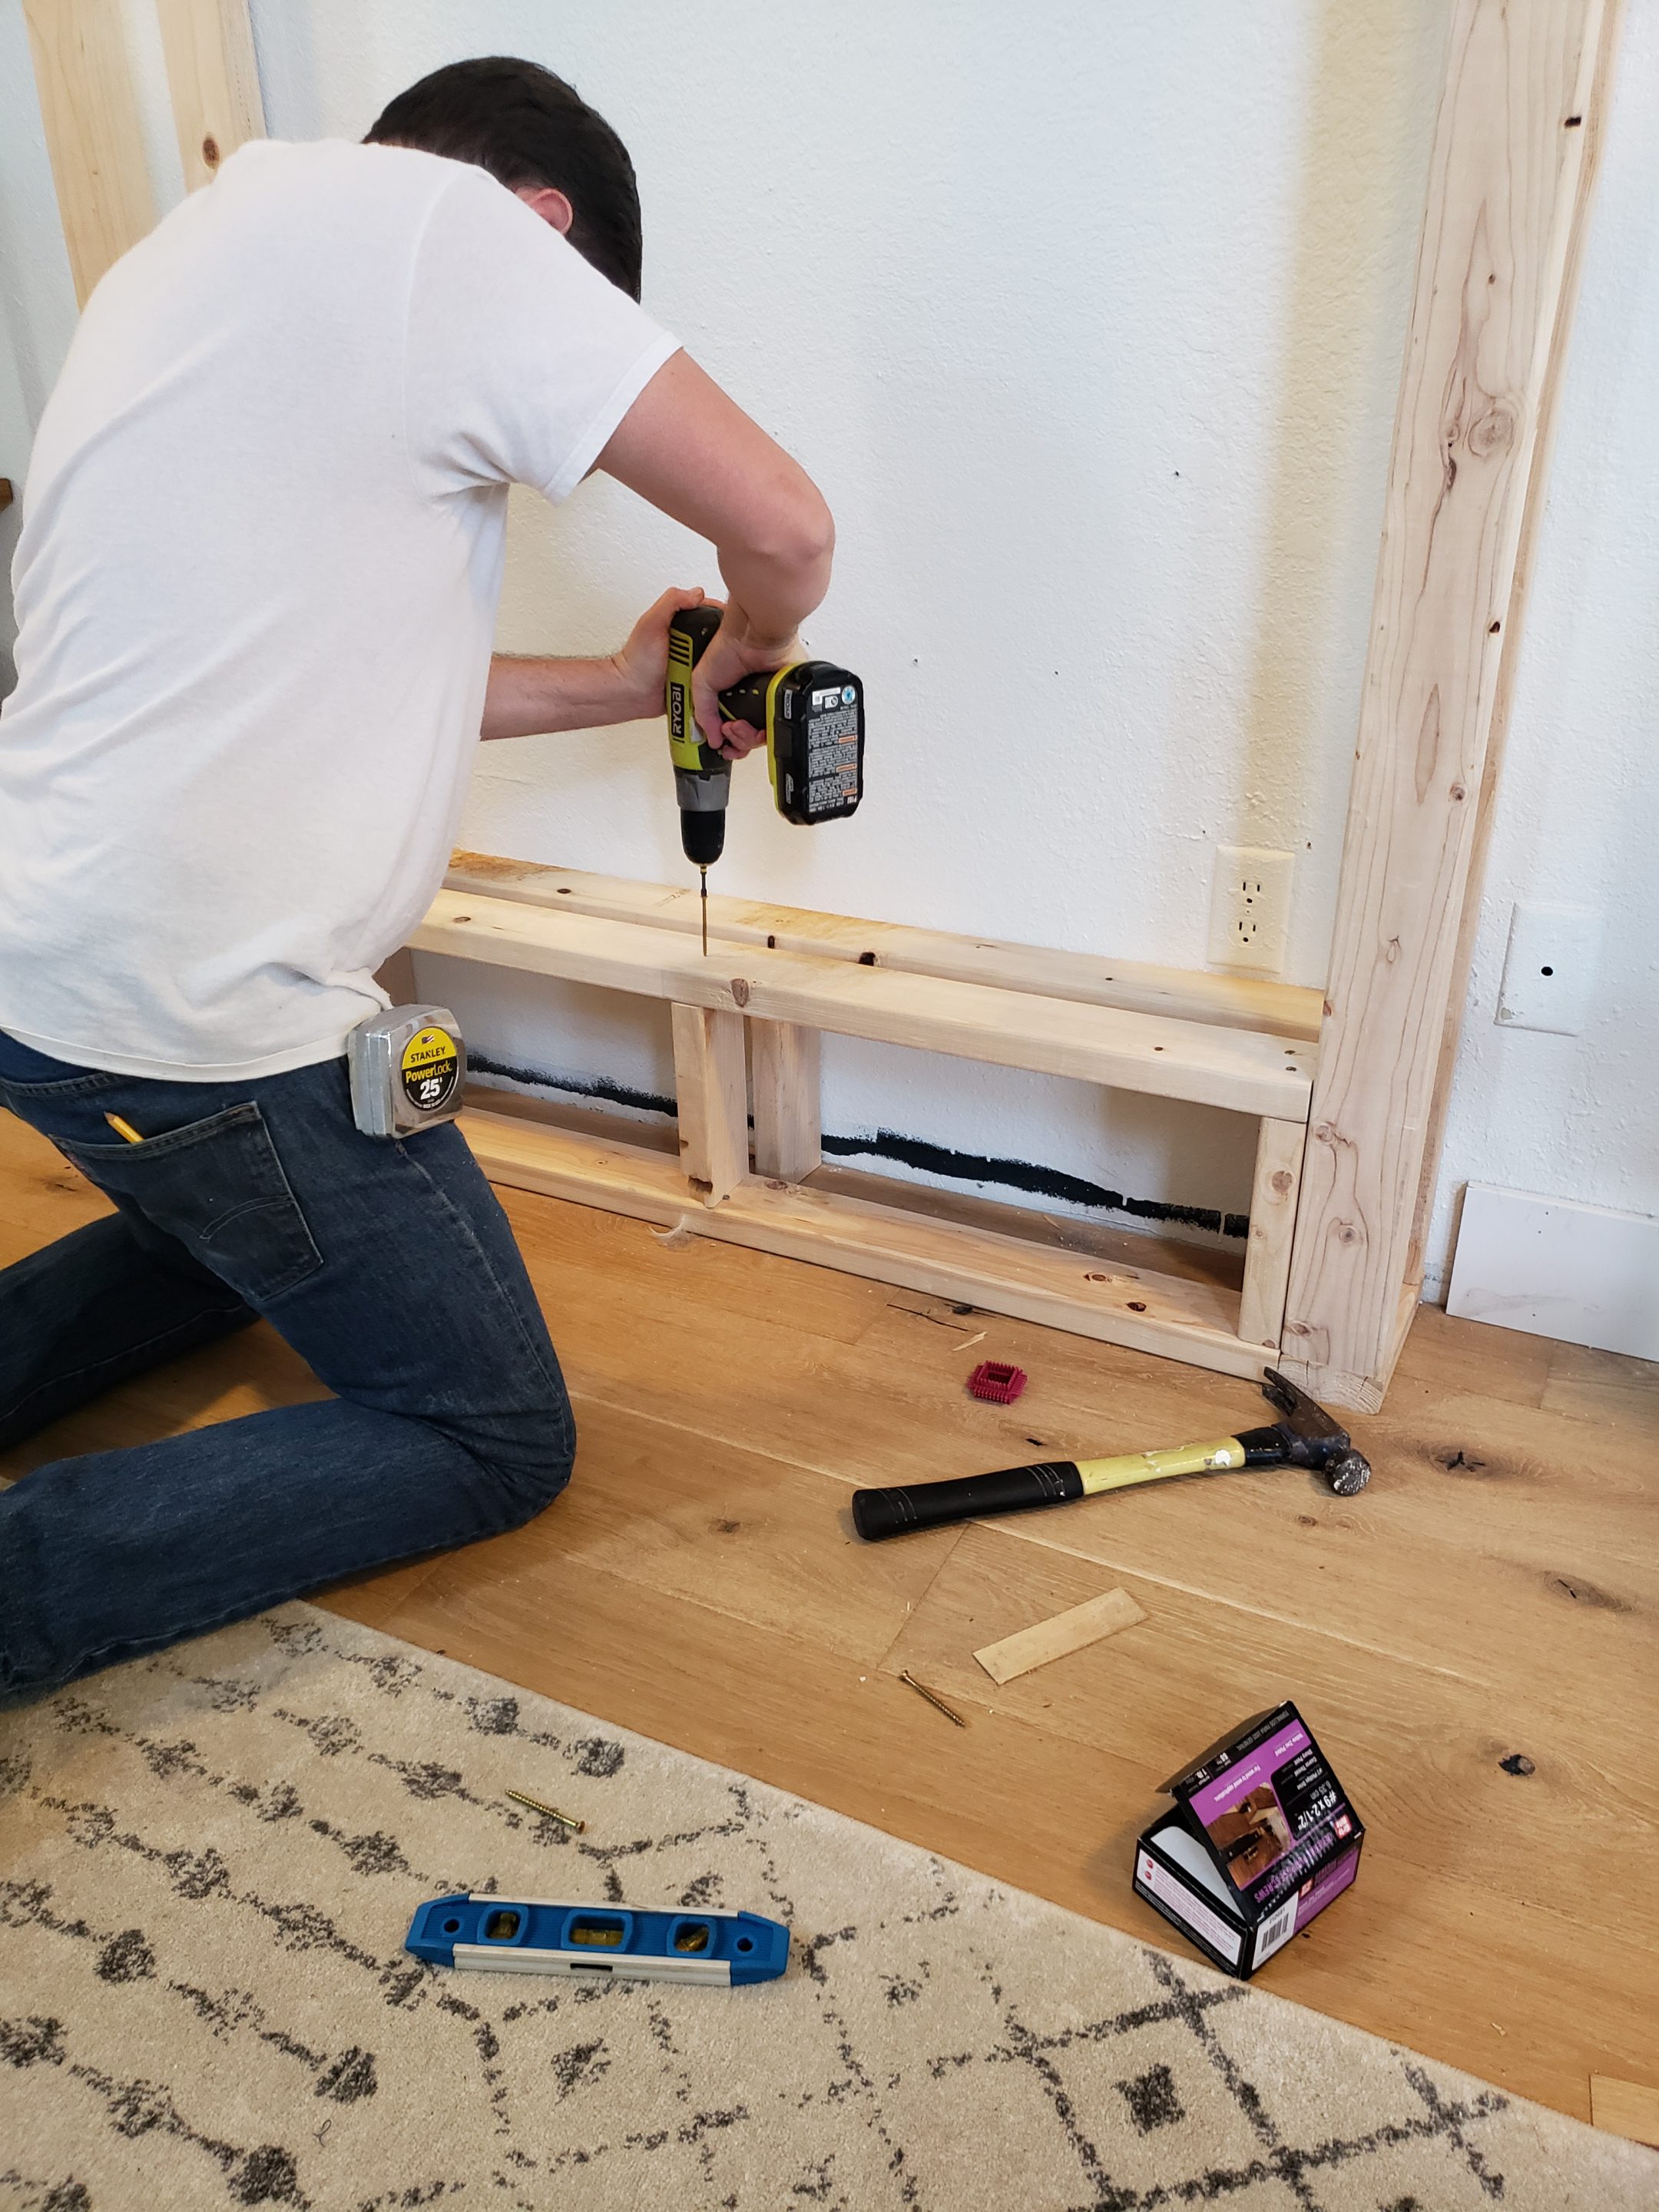
- Nail the 8 inch pieces of the 2×4 (from step 1) to the tops and bottoms of the studs (determined in step 2), to create the 2 side walls. Nail 1 of the 4 3/4 inch pieces (from step 1) in between the studs to provide support.

- Bring the side walls into the house and put them in place. Often times they need a little persuasion from a hammer or rubber mallet to squeeze into place because they will have been made to fit snugly. With these side walls built and lined up on the lines you drew on your wall, attach them to the floor using screws or nails. Our side walls did not line up with a stud on our existing interior wall so we had to screw the side walls into the ceiling and floor at a 45 degree angle to catch the top plate of our existing interior wall. *Before moving on- measure bottom middle and top to make sure nothing shifted on you during install.
- We measured the inside distance between the two side walls which was 46 inches. Took this measurement and cut a piece of 2×4 to size (you should have scrap left over for this). We attached this 46 inch length of 2×4 to the floor between the side walls, flush with what will be the front wall of our surround. This 46 inch board is now the bottom plate of our front wall. Repeat this same step to install the front top plate and then attached that front top plate to the ceiling.

- Next we determined how high we wanted our fireplace off of the ground. We went with 12 inches. In order to have this floating effect we had to build a platform for our fireplace to sit on.
- For the platform we cut 3- 9 inch pieces of 2×4 for the front of the platform and 3- 10 1/2 inch pieces for the back of the platform (the back of the platform will sit flush to the floor, the front will rest on the front plate (from step 5) which is why the measurements are different).
- Attach the 3- 9 inch pieces along the front plate, 1 on each end against the stud and one in the middle. Repeat the same steps for the back using the 3- 10 1/2 inch pieces *these will attach to floor.
- Next we cut 2- 46 inch pieces of 2×4. One that will go between the front studs (on top of the 9 inch pieces from step 8), and one that will go across the 10 1/2 inch pieces along the back (also from step 8). We placed these 46 inch lengths directly on top of those 9 and 10 1/2 inch boards *there will be a gap in the middle* Secure 46 inch lengths in place with screws or nails.

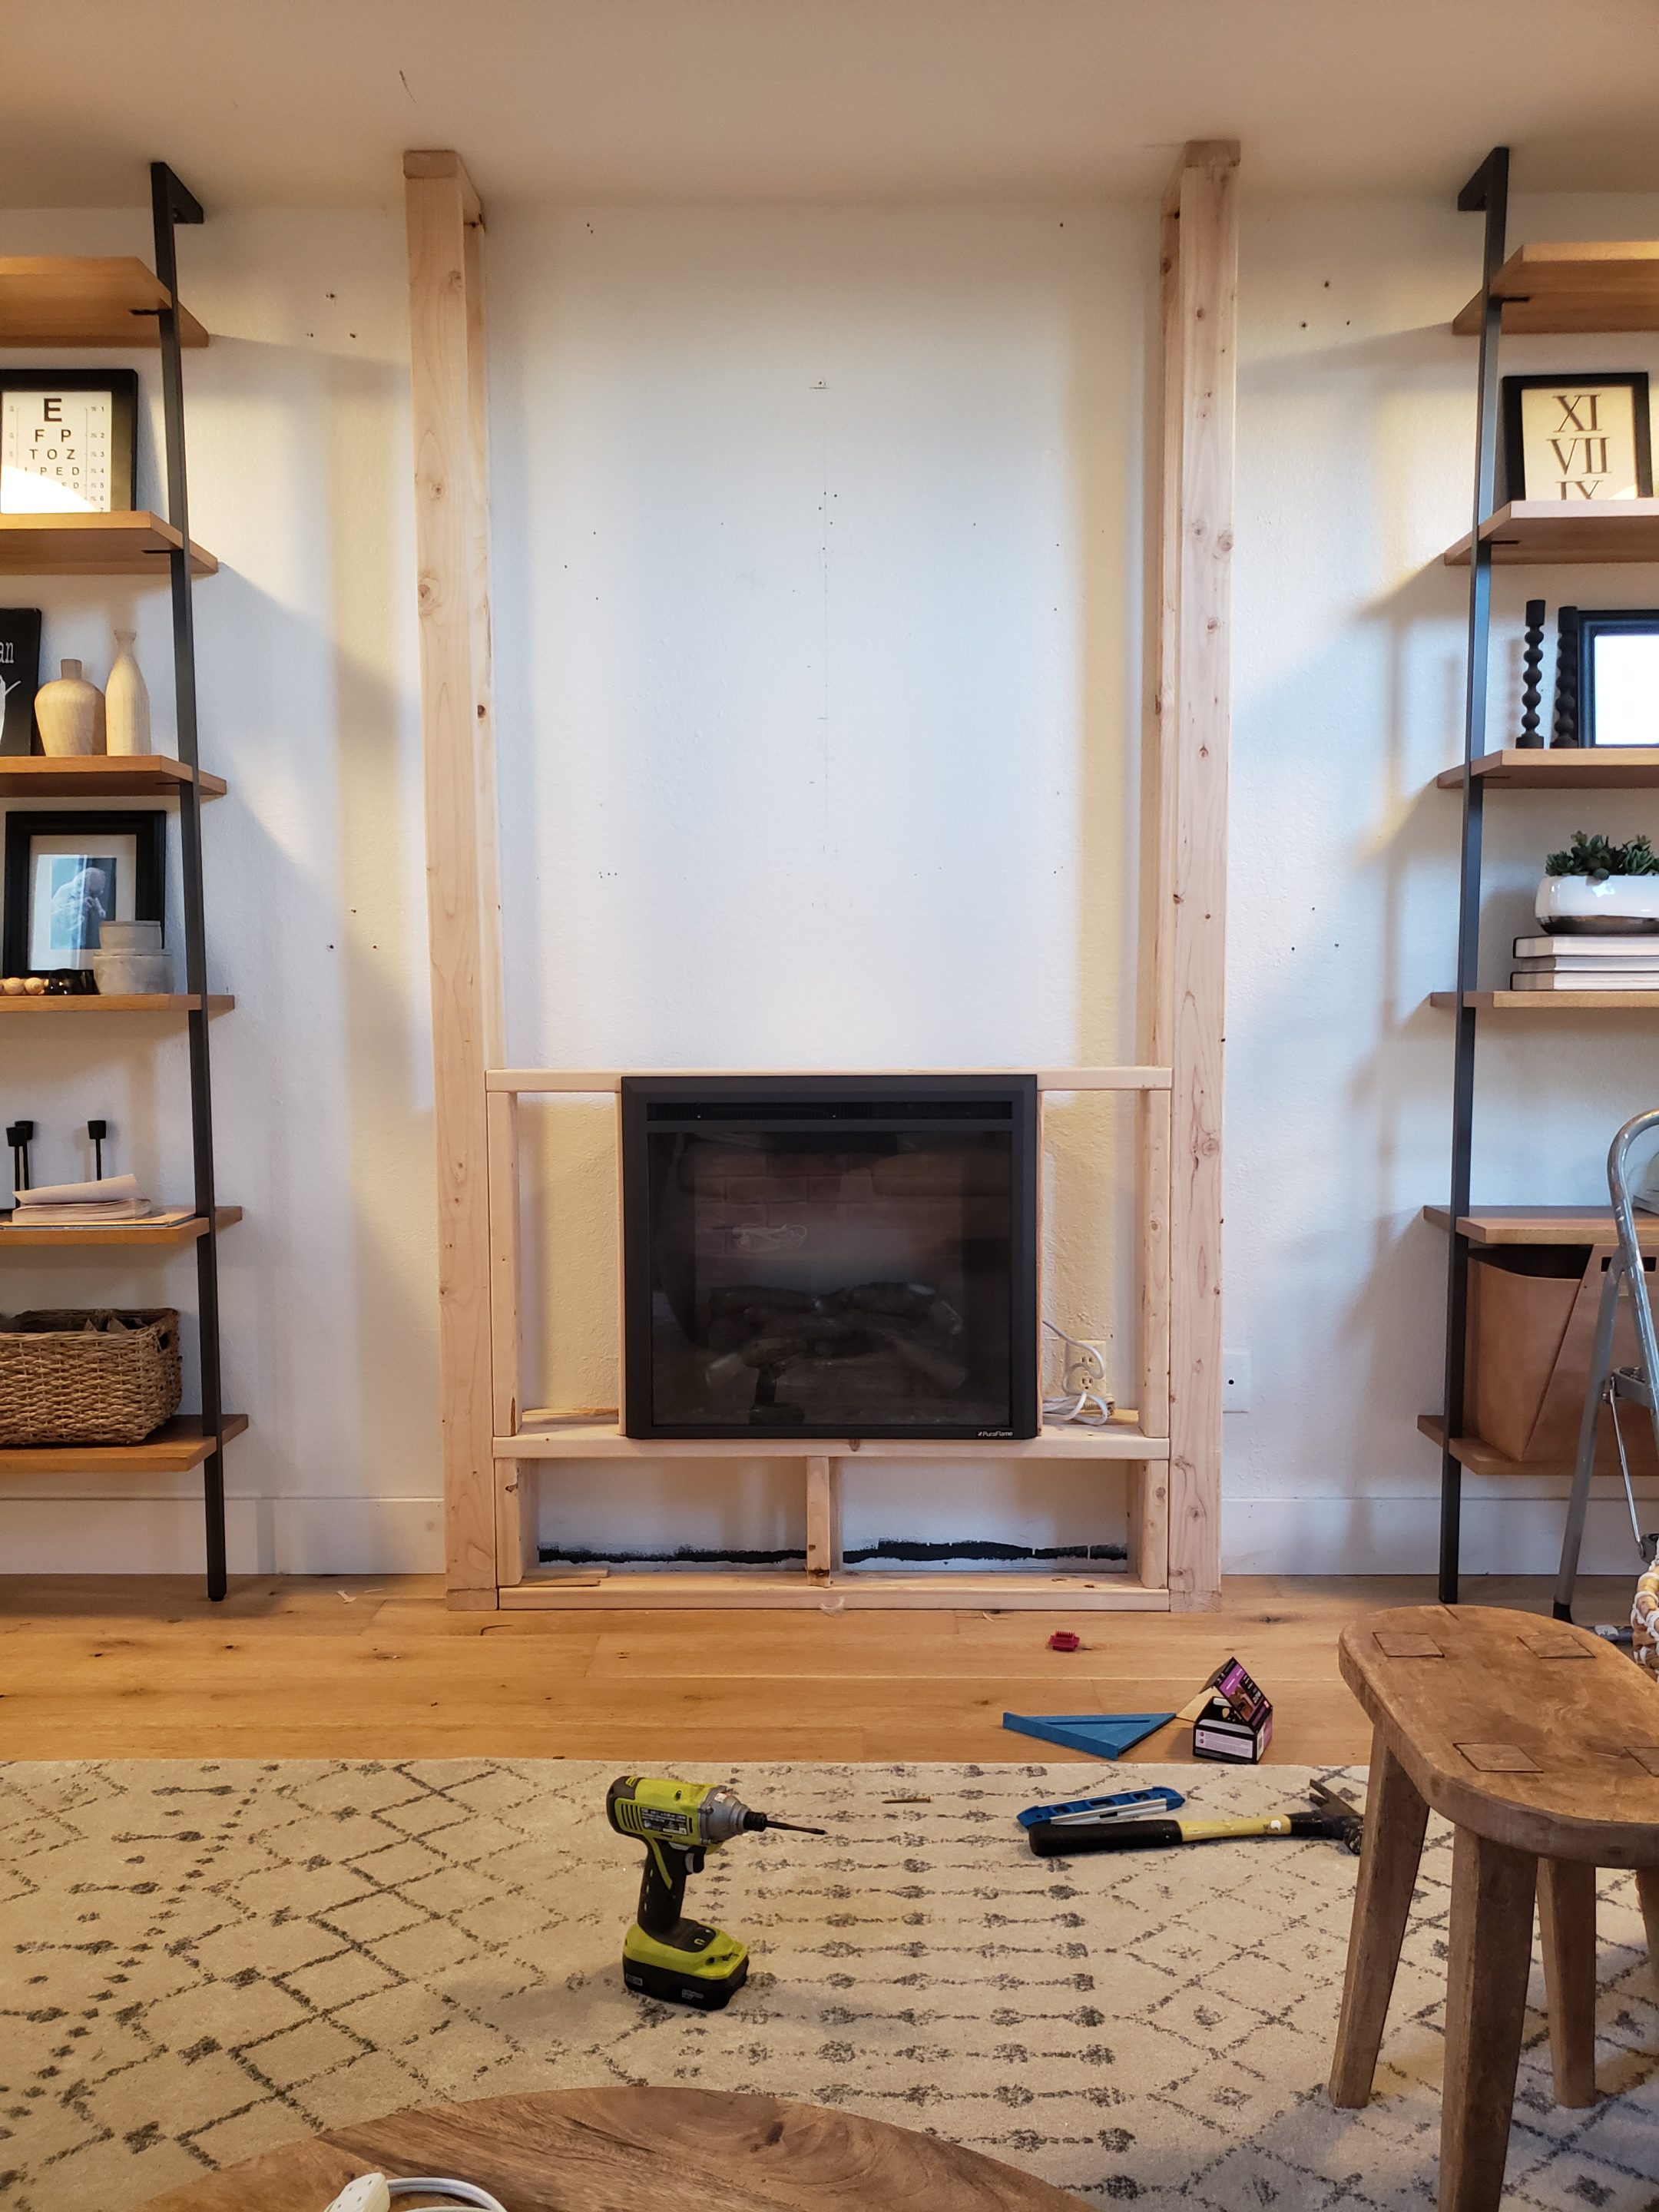
- Next we put our fireplace on the platform to ensure it sat level, and we still loved the height. Then we slapped a high five and took a break!
- With the insert centered we can now finish off the framing. We started this next phase by measuring up from the platform to the top of the insert 23 1/4 inches. This measurement is not from the platform to the black trim, it is from the platform to the actual portion of insert that will live inside the wall. This interior portion of the insert does get warm so we wanted to allow a little room to breath, we gave it a 1/4 inch. This was done by measuring from the platform to the top of the insert and adding a 1/4 inch to that measurement making is 23 1/2.
- We cut 4- 23 1/2 inch pieces of 2×4. Install 2 of these 23 1/2 inch pieces, attach one of these 23 1/2 inch lengths to the std on the right side wall and the other to the stud on the left side wall. The next pair of 23 1/2 inch lengths will be installed after step 13.
- Cut 1- 46 inch length 2×4 attach it to the top of your 23 1/2 inch cut pieces (from step 12).
- Now take the 2 remaining 23 1/2 inch lengths (from step 12) and place them on either side of the insert, snug but giving just a little wiggle room. You want them to be close, but the insert still needs to be pliable. Remove the insert and set aside to continue build.
- Measuring up from the 46 inch board (from step 13) to the top plate attached to the ceiling (from step 5). This measurement was 57 inches. We cut 4 pieces of 2×4 to size (57 inches).
- Attach one of these 57 inch lengths to the right side wall stud and one of these 57 inch lengths to the left side wall stud. The other 2- 57 inch lengths will be placed 13 inches apart ( see image)

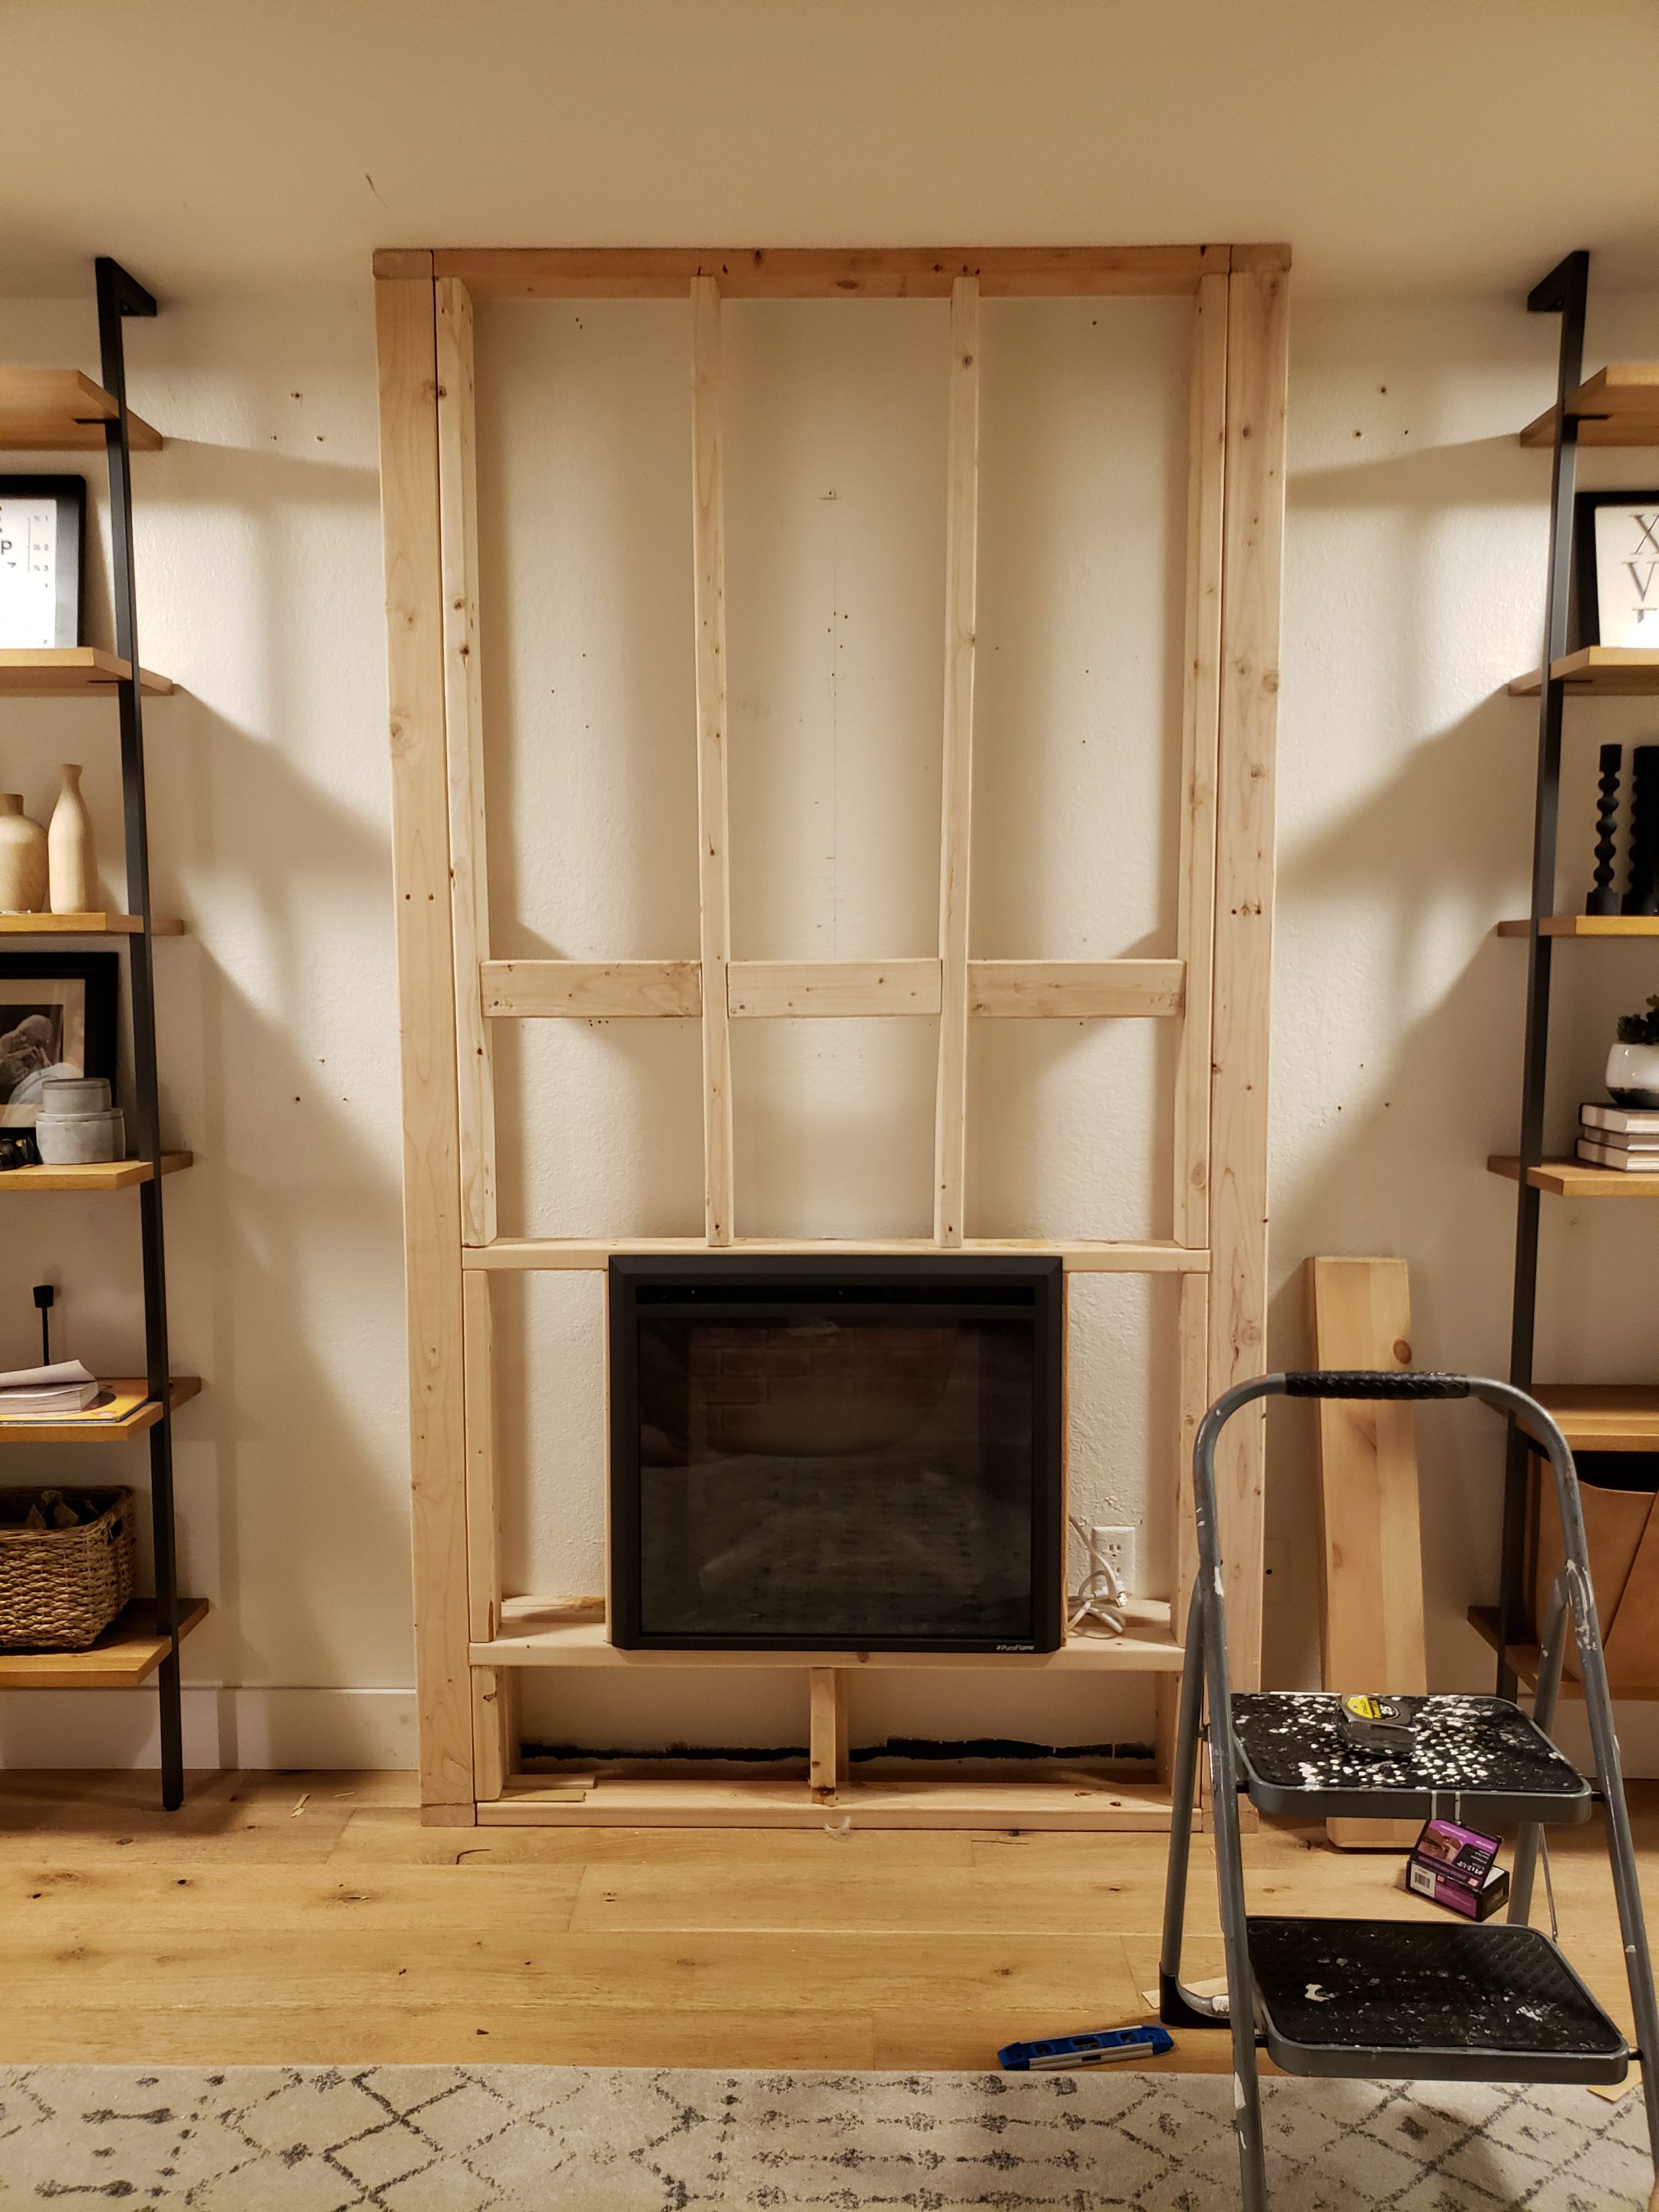
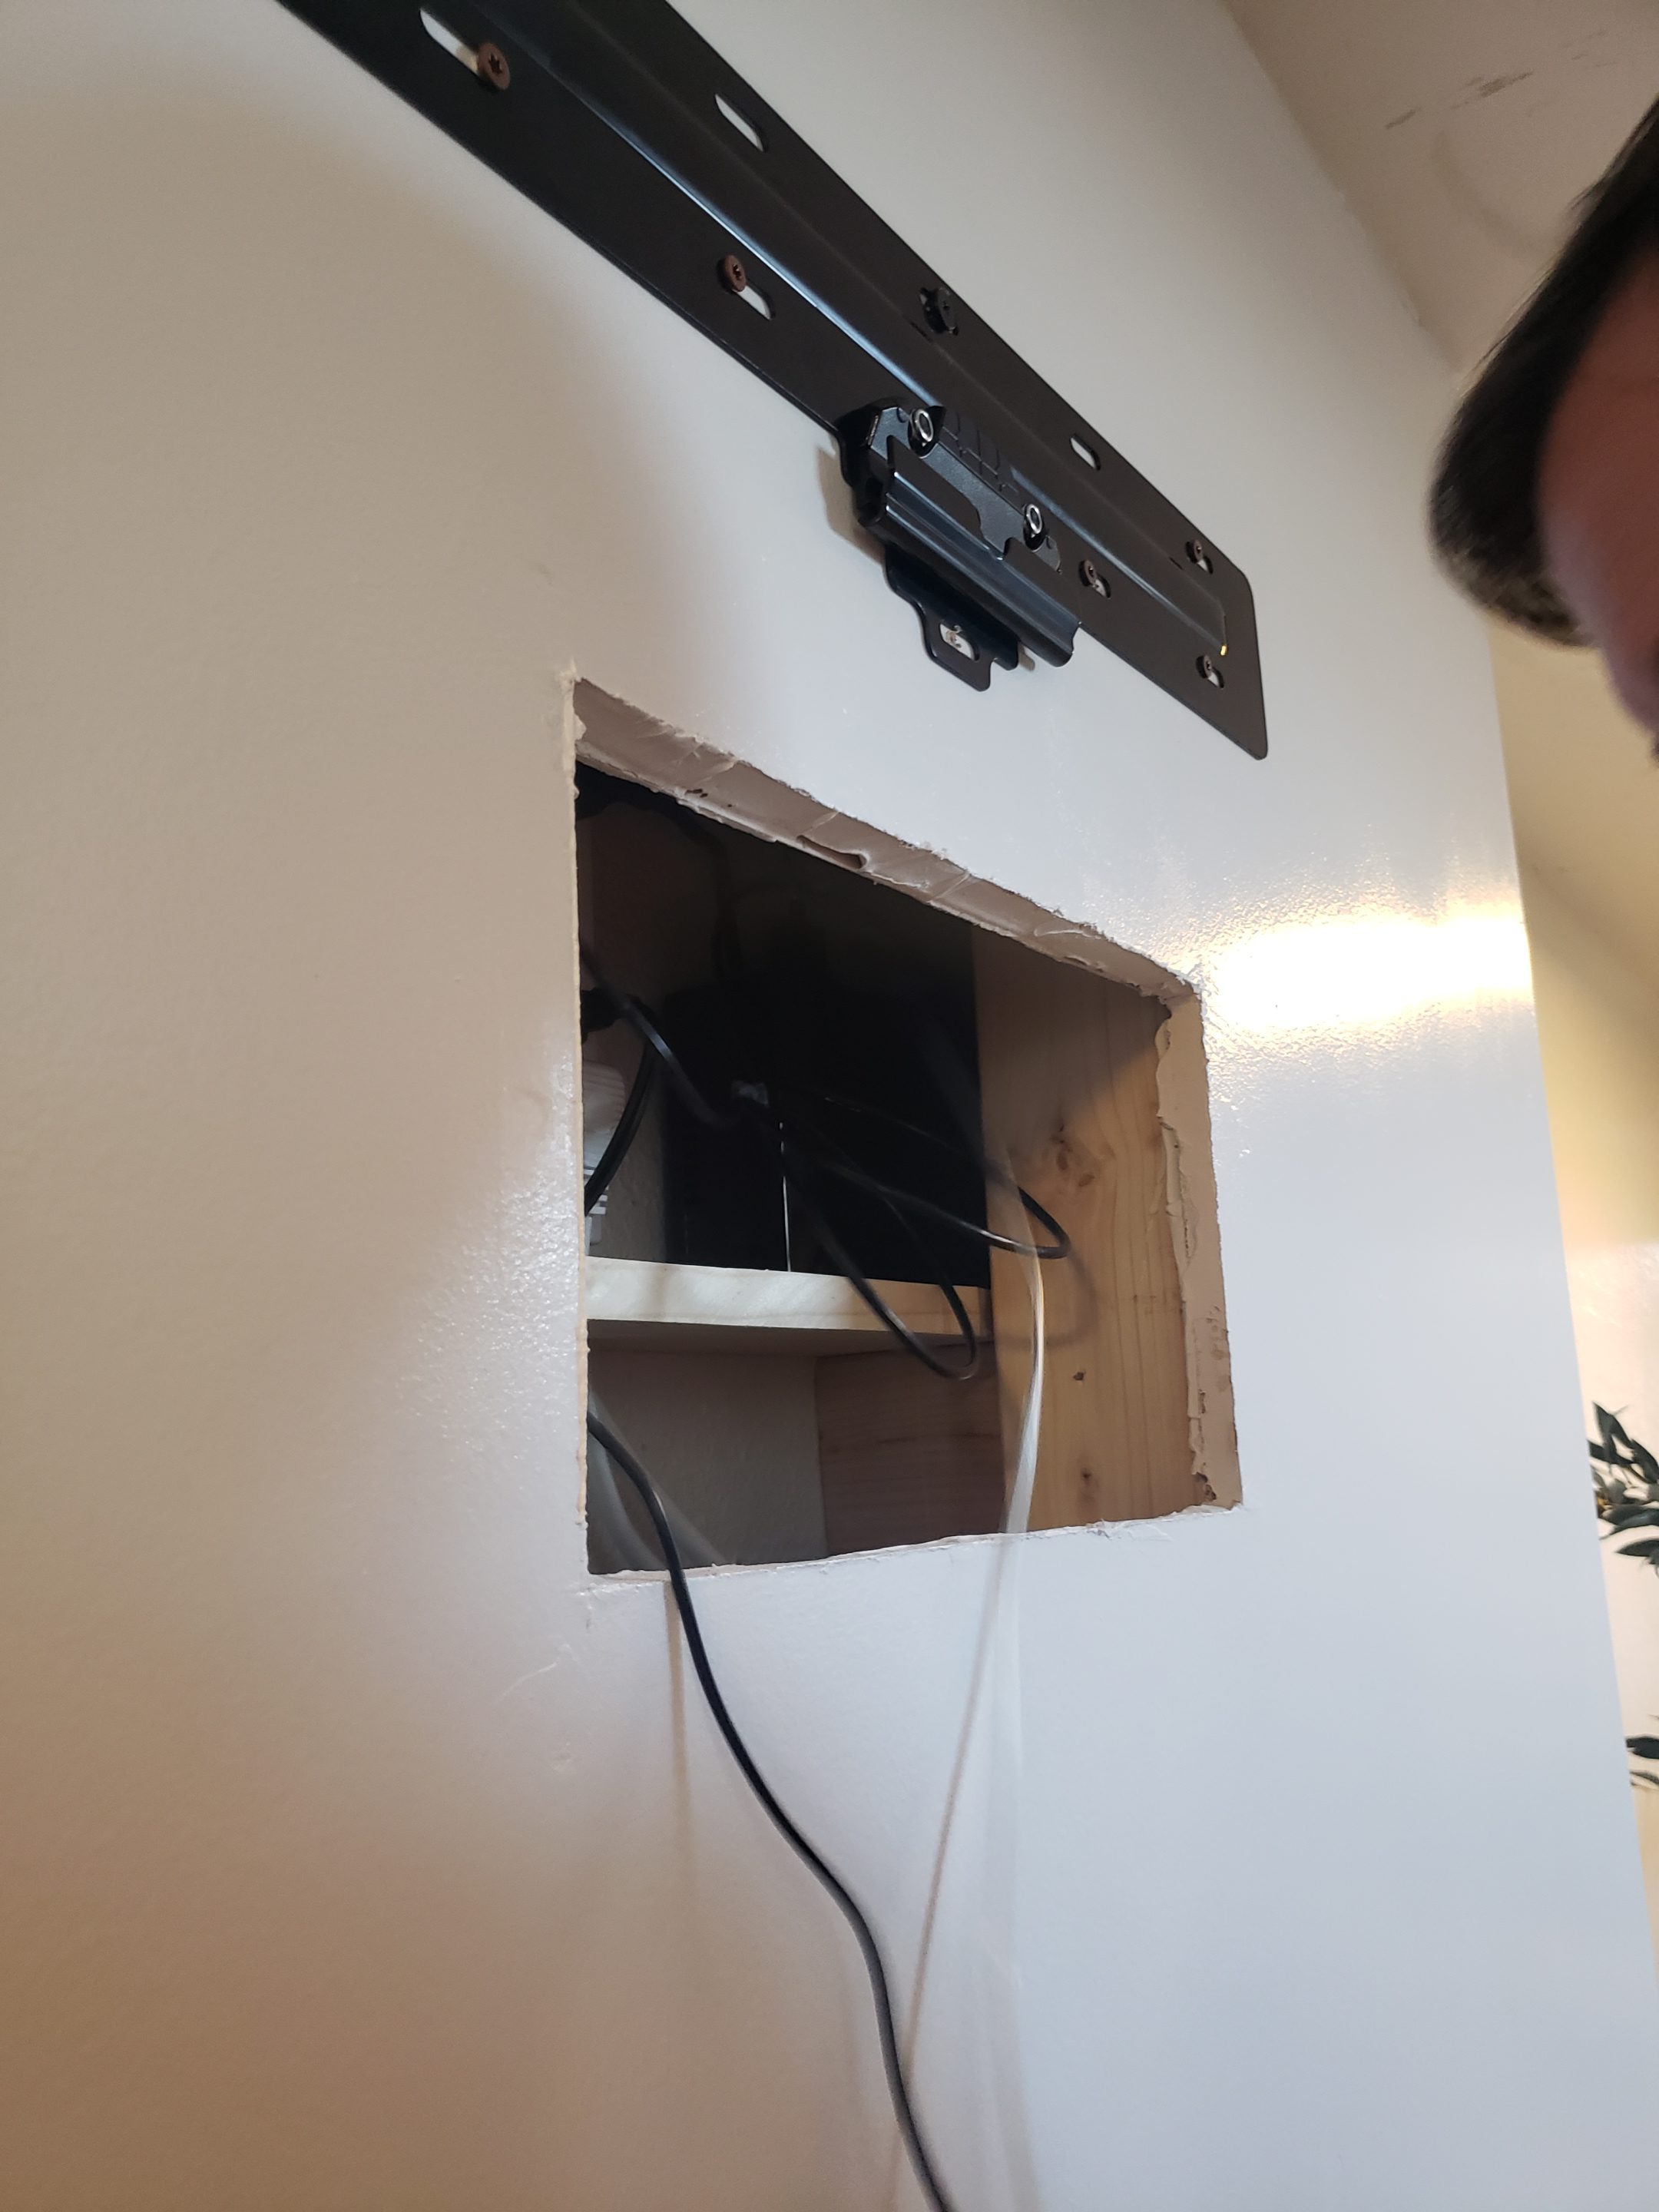
If you will be mounting a TV and want to hide the wires and components you will need to create a shelf for them to rest on inside the framework. We did so by taking 2 pieces of scrap 2×4 cut to size and attaching it *at TV mount height* behind the each of the 57 inch lengths (from step 17). Next we took a piece of 1×8 cut down to size and attached it to the 2×4 scraps with nails making a shelf. *Make sure your components can easily fit through the hole you create for them once sheetrocked. Also that your surge protector and any other electrical are prepped and will be accessible through this component cubby before sheetrock.
SHEETROCK:
- Because we built our surround bigger than a single sheet of sheetrock (they come 4ft x 8ft) we had to cut 1-54×48 inch piece off of each of the 2 sheets. Then cut 4- 8×48 inch pieces out of the remaining sheet to fully enclose our framing.
- Take 1-54 inch sheet of sheetrock and hold it against the bottom of the frame, now you or a helper reach inside through the side of the framework and with a pencil or pen trace the outline of the insert hole. Remove the sheetrock, take outside and cut the insert hole out. Bring it back in and nail it in place with sheetrock nails. We prefer nails, because we can go faster with them. Now do the same with the top piece, except no need to trace and cut the insert hole here, however if you are mounting a TV cut a hole for the component cubby. *pictured below*
- Next attach the 2- 8×48 inch pieces to either side of the frame. Don’t worry about the corner edges too much, they will get plenty of nails when we attach the corner bead.
- The corner beads come in 8 foot lengths so they were good to go for us. Bring in these corner beads and take your time here. Be patient, don’t bend it, make sure it remains lined up as you place the many many nails.

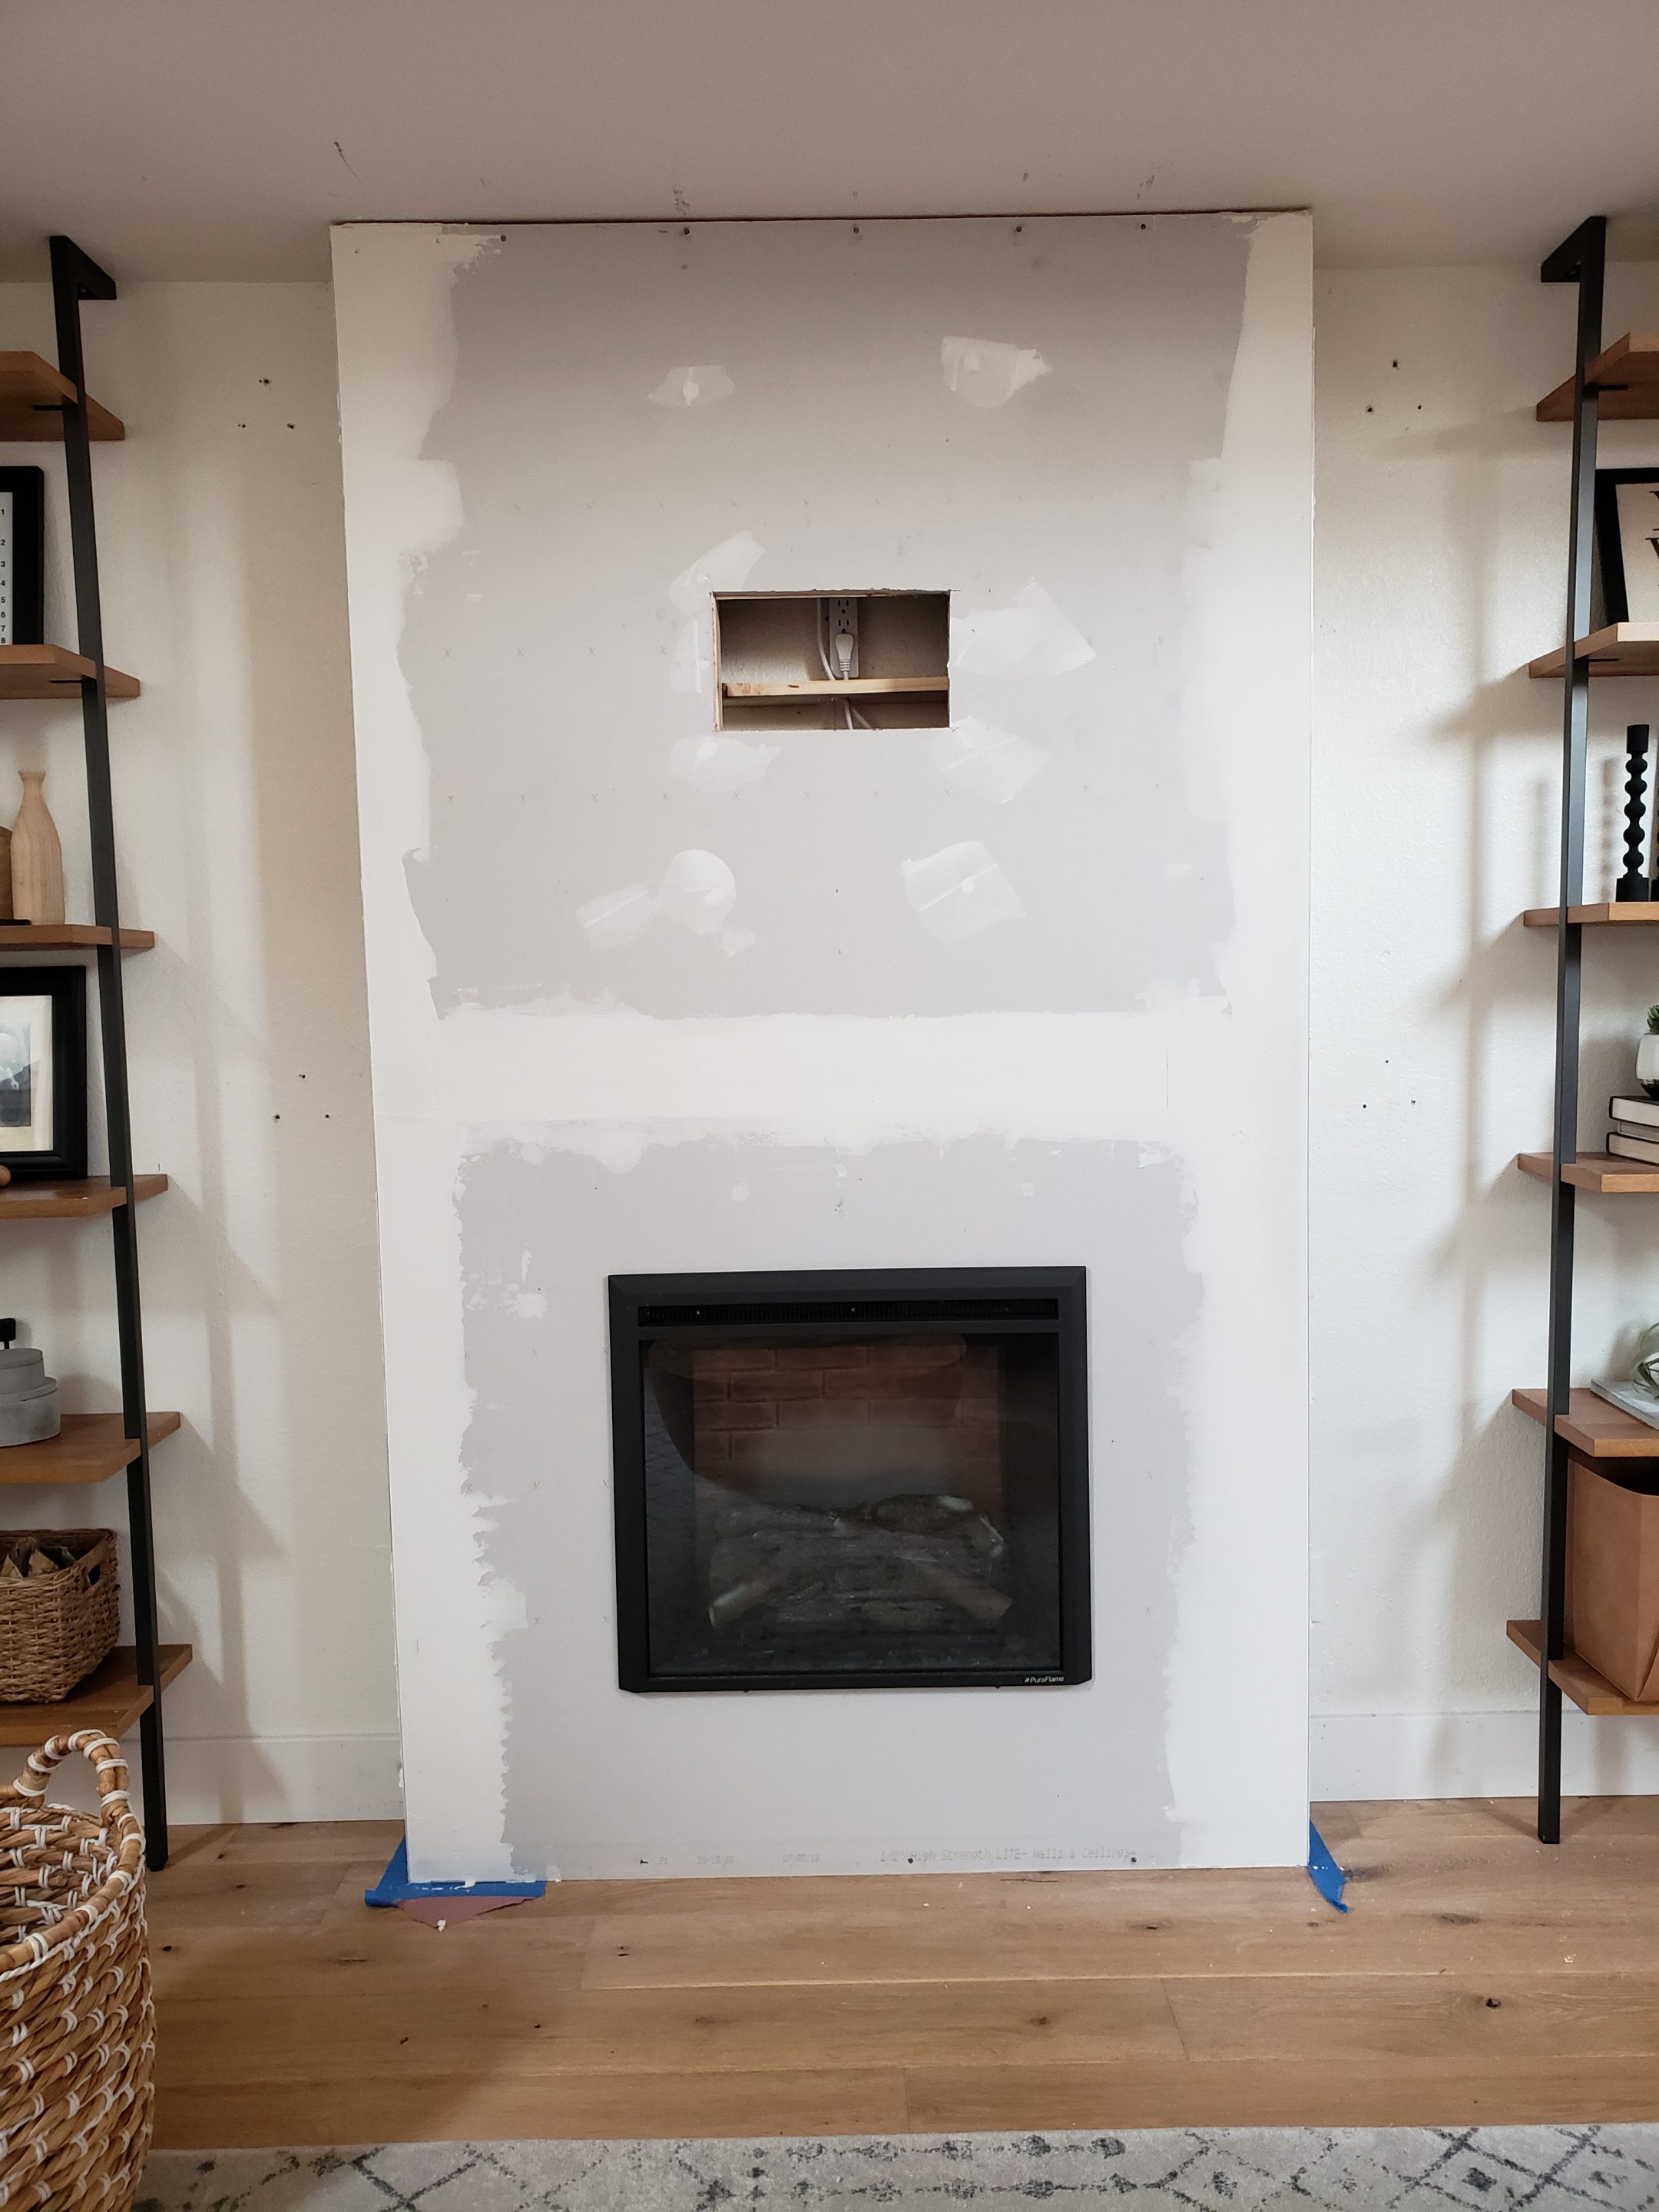
TAPING & MUDDING
- Put some paper down, it is about to get messy!
- Spread joint compound along the joints of your sheetrock, not too thick, but not too thin, about 4 inches wide.
- Next cut some of the paper tape the full length of the entire joint and gently press it in place, run your putty knife over this tape to press firmly against the joint compound. Spread more joint compound over that tape and then smooth it out with your putty knife. You should not be able to see the tape but make sure it is smooth, not a big hump, or else it will show forever. Repeat this over ALL joints.
- The screws and nails which will hav been set just below drywall will also need to be covered with joint compound, no tape necessary here.

- The corner beading needs joint compound as well. Add joint compound and smooth out so the metal flashing is covered.
- Let everything dry thoroughly. TIP: point a fan at it to speed things up. *We did not tape and mud the corners that meet the existing wall and ceiling. This is because we did a smooth finish for the fireplace surround, and the walls and ceiling are textured. We finished those corners with caulk.
- Once dry take a damp sponge, and wipe down all of the joints. This takes most of the excess material off without creating dust. The goal for us was smooth, no lines, texture or bumps. Do not expose the paper tape.
- After sponging the excess compound off, you will still need to do an overall light sanding using a 180 grit sanding screen. *If there are any small holes or other little imperfections you can fix them with spackle, which saves a lot of dry time versus repeating all of the steps above.
- Next we painted using the 2 in one primer by Behr in Ultra Pure White, semi-gloss finish. It took us 3 coats.
FINISHING TOUCHES:
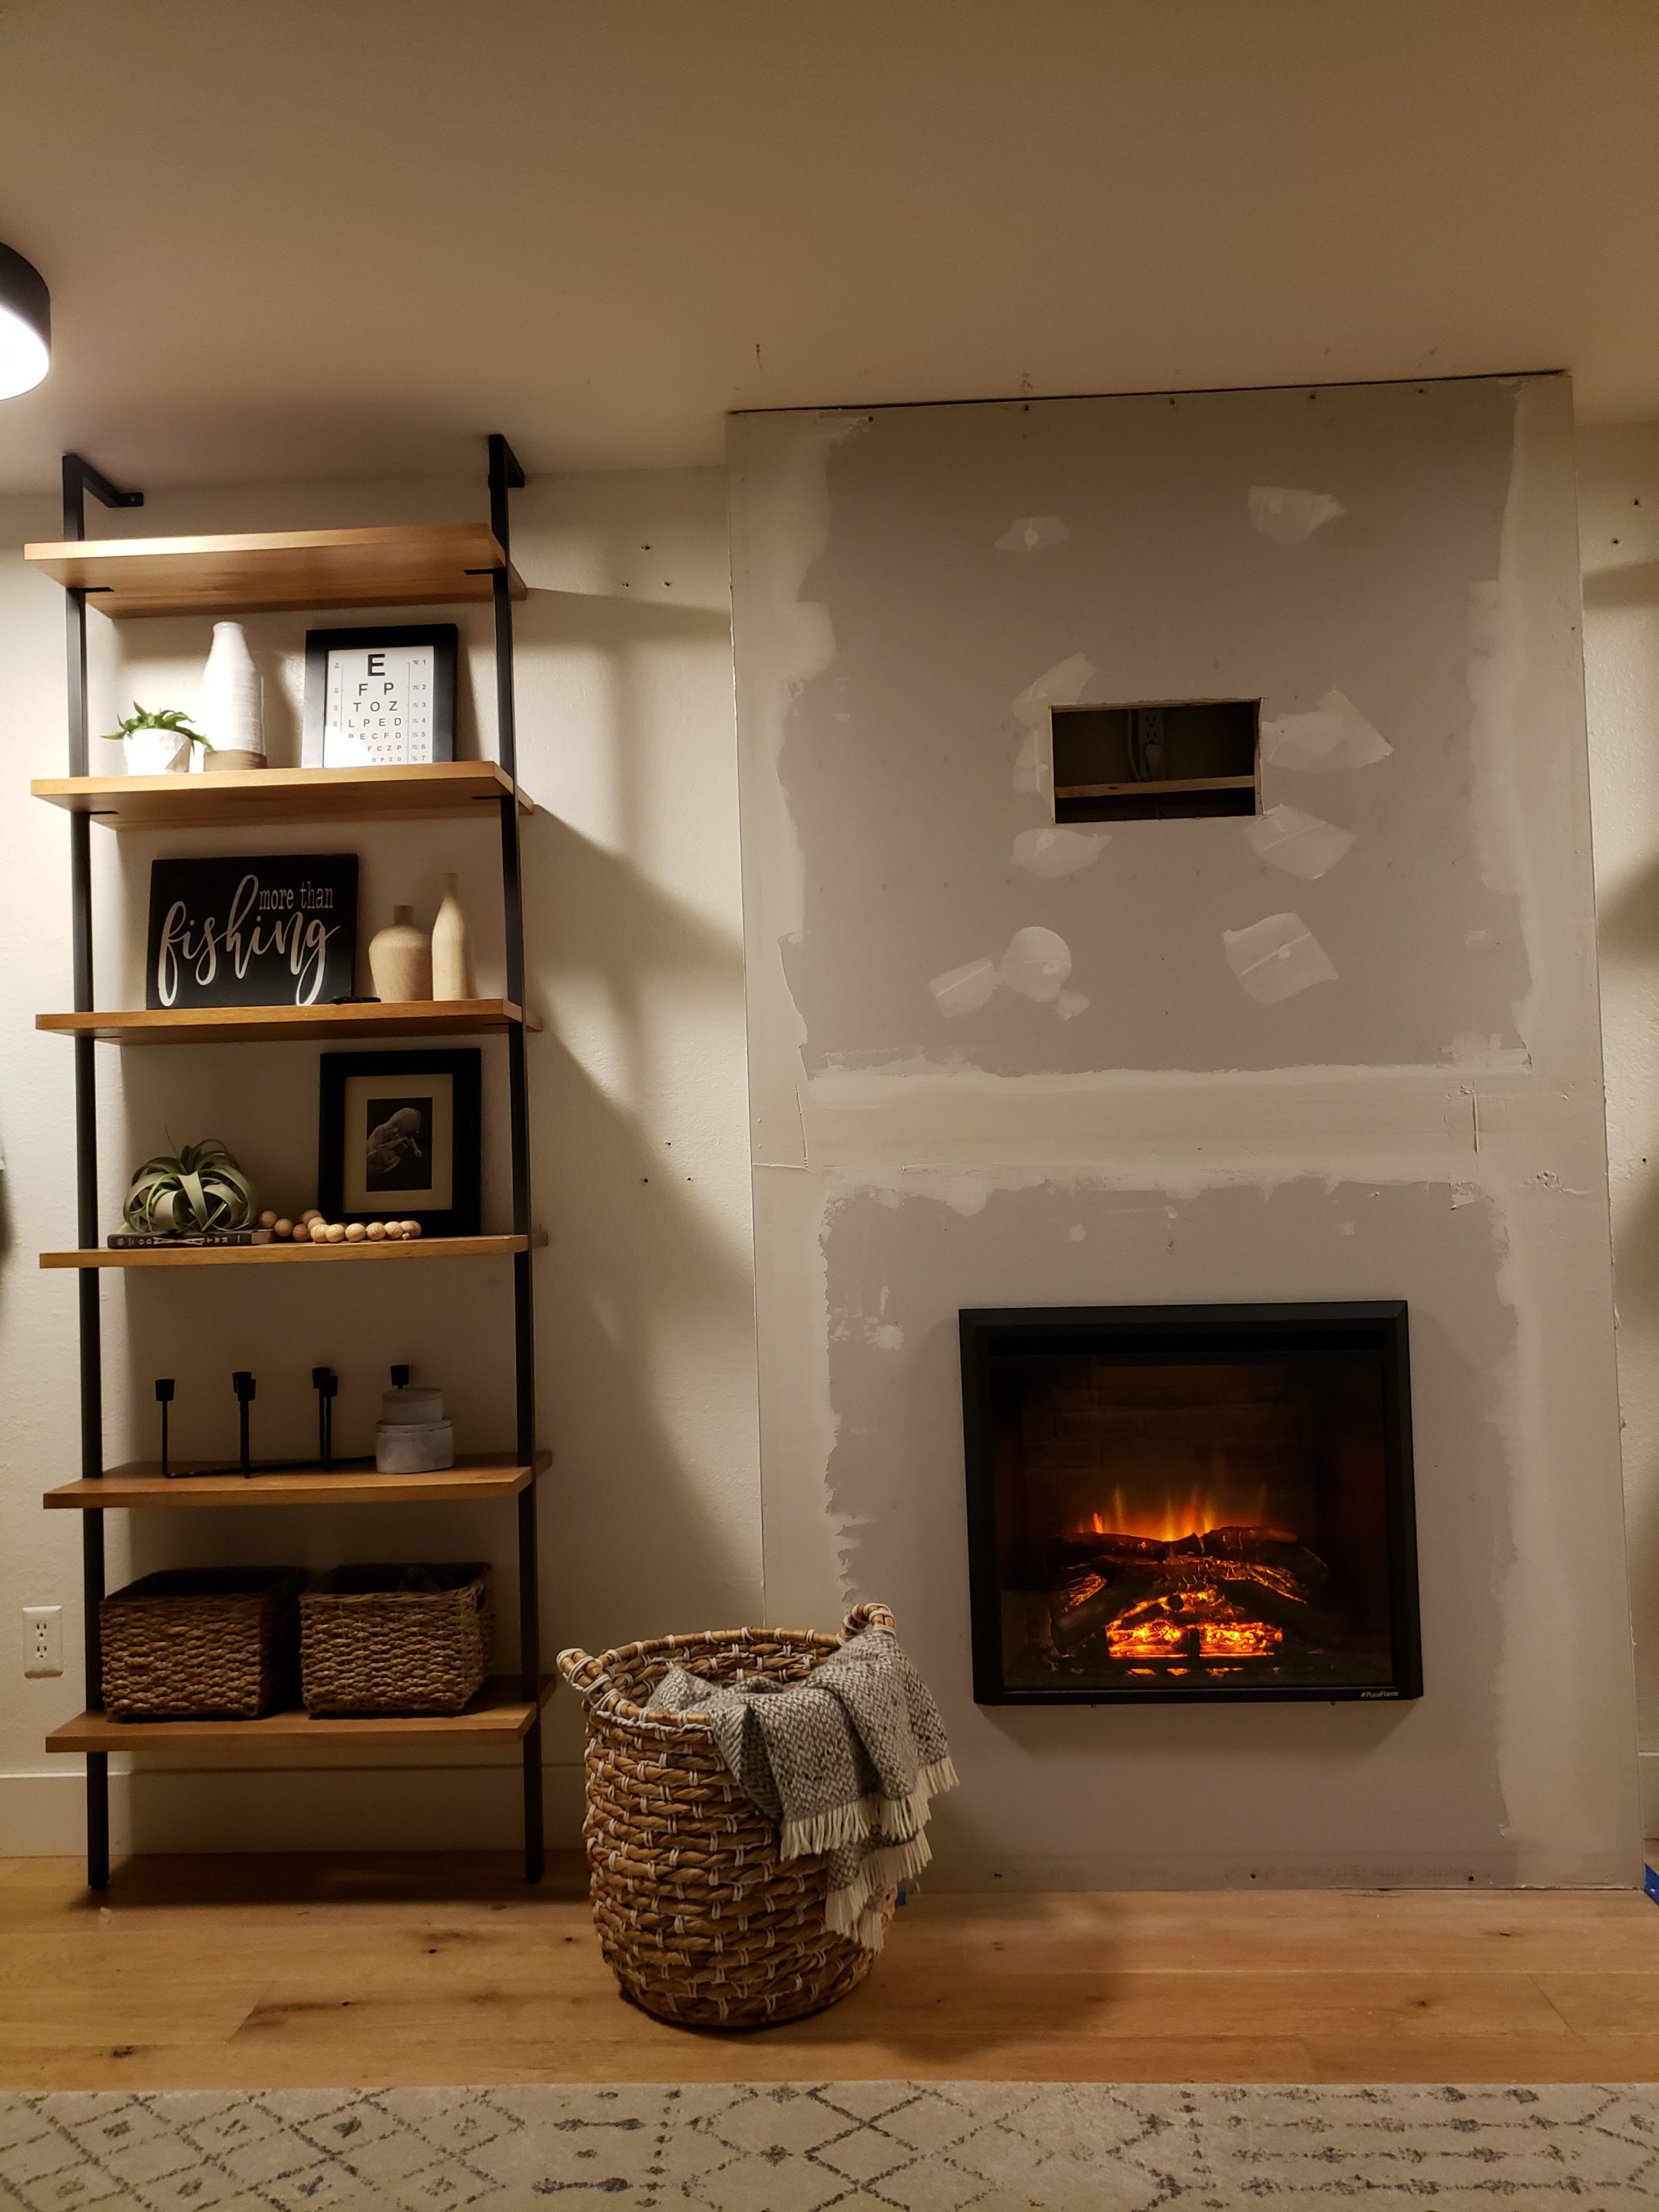
- Put the insert in place. This is as simple as lifting and sliding into place, adjusting with shims if necessary, we did not need to use shims.
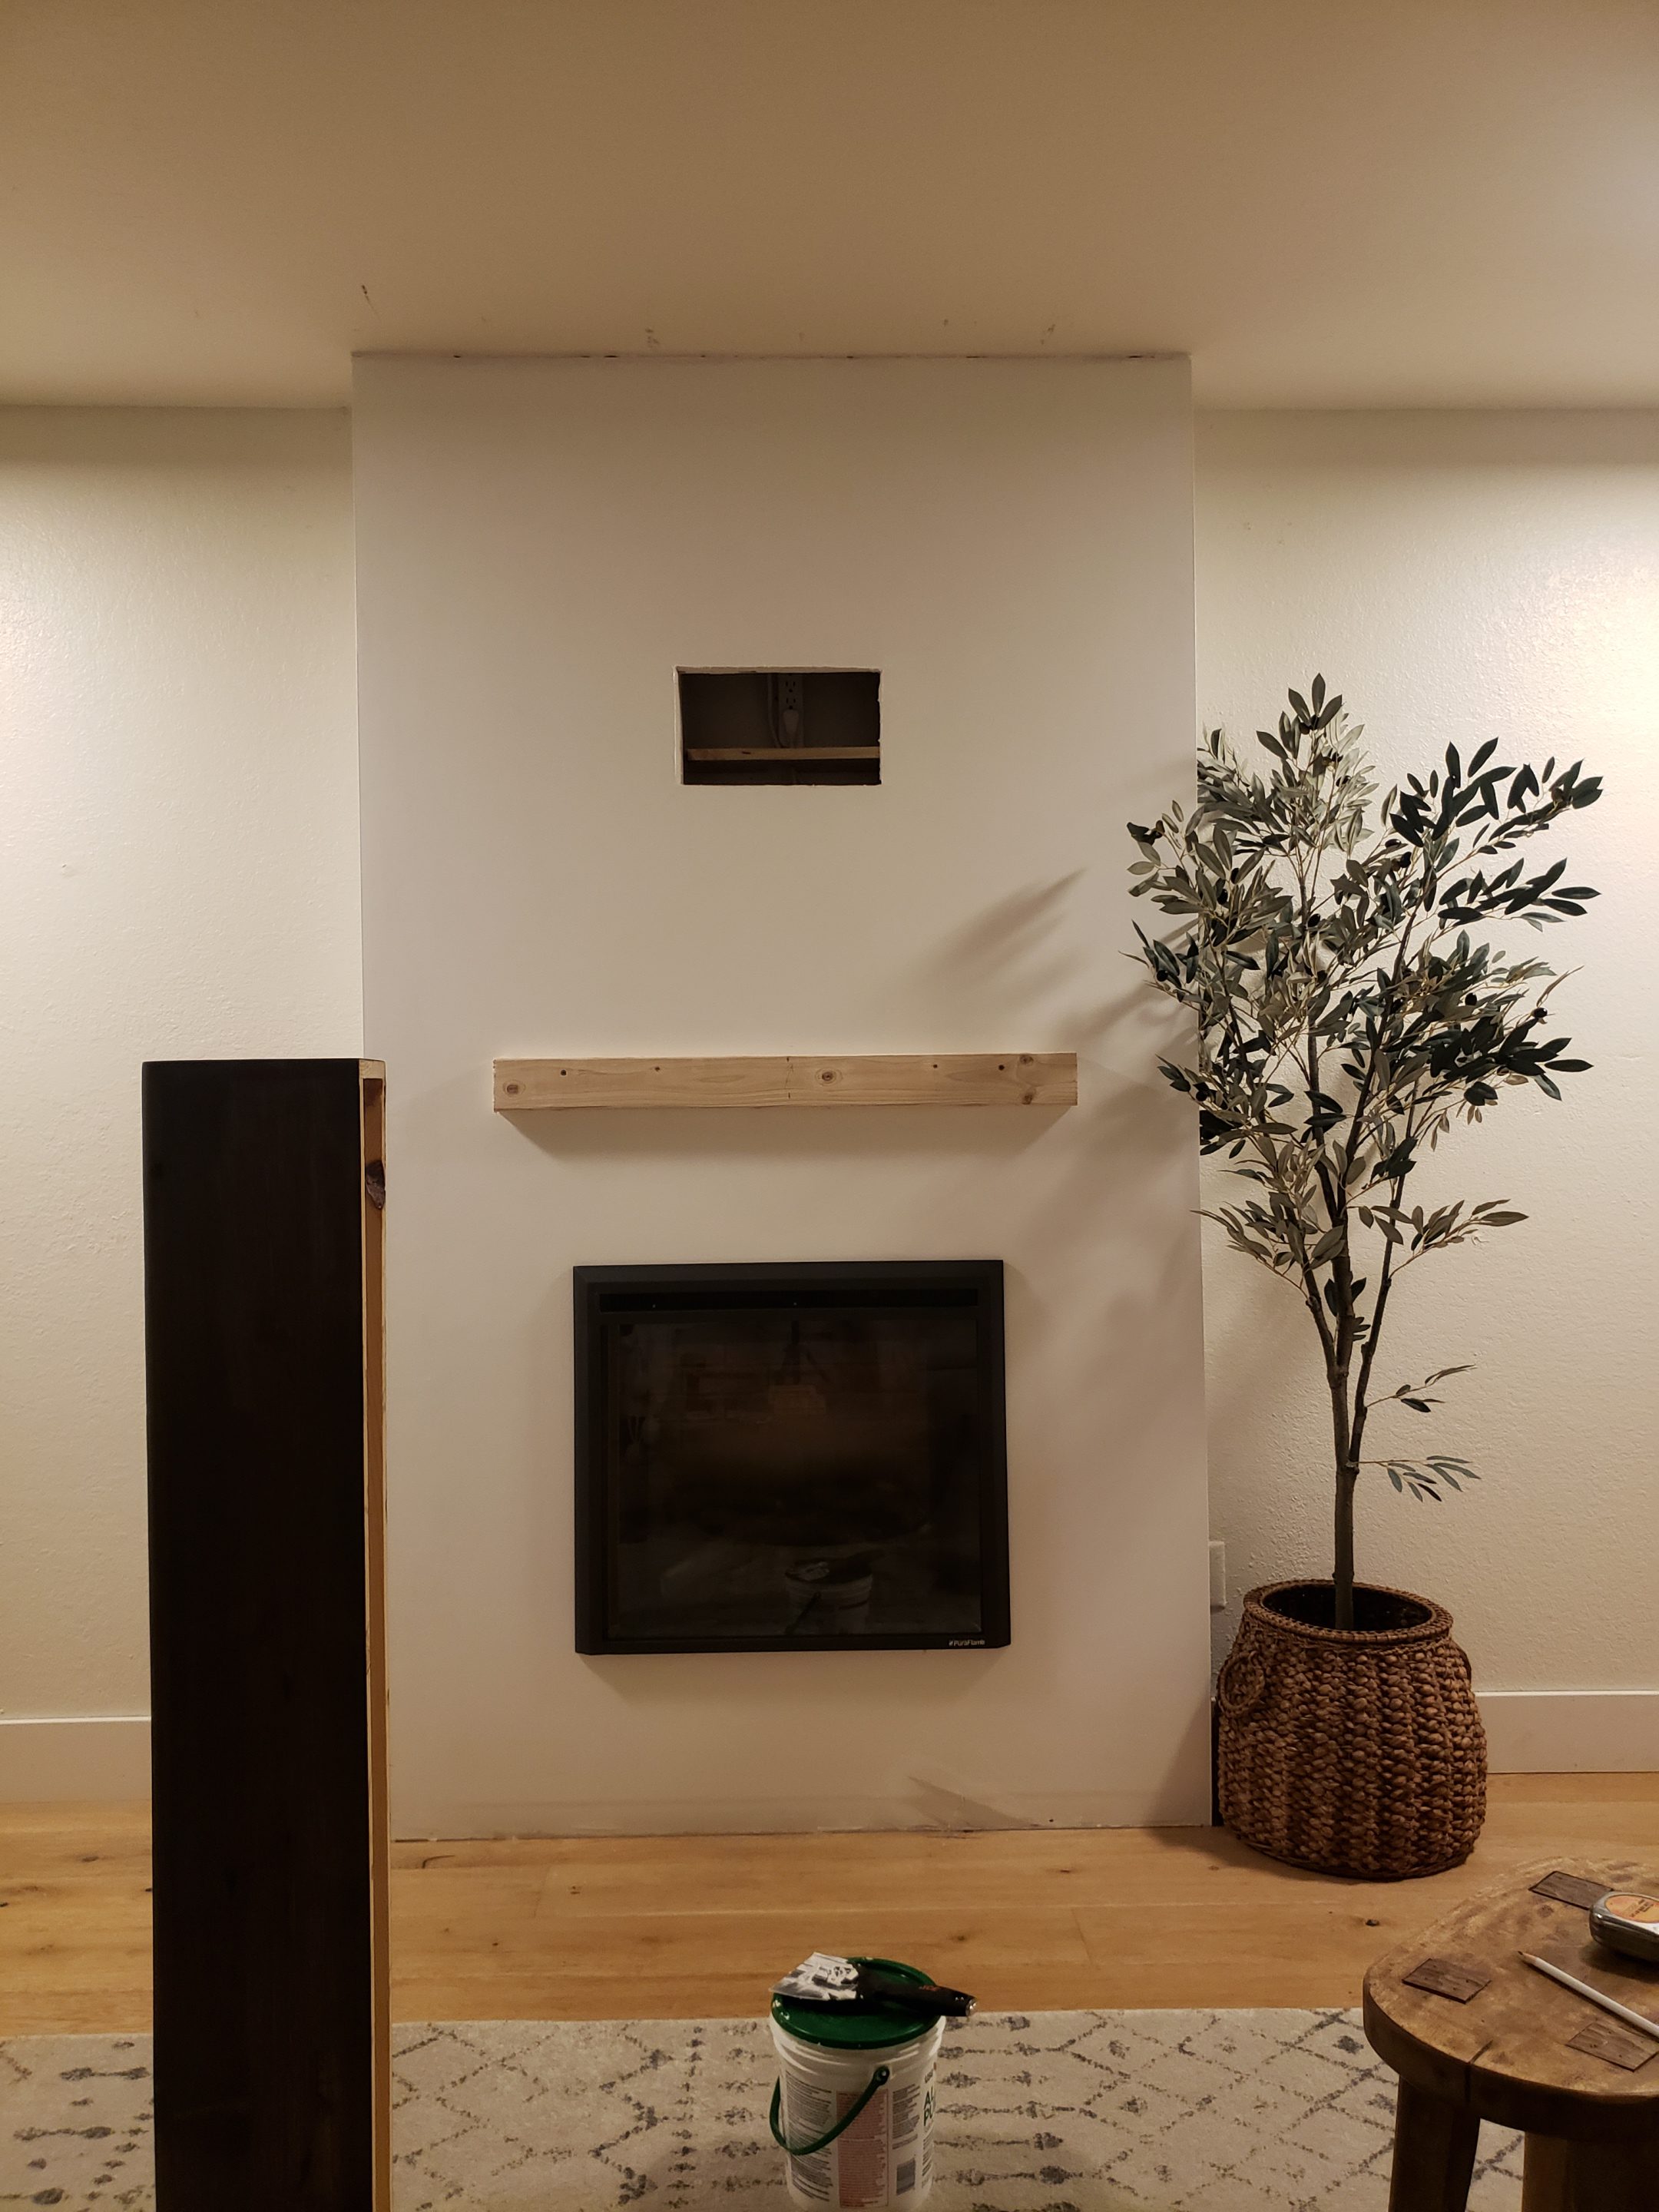
- Mount the Mantel. Our Mantel is not a solid piece of wood, it is essentially a backless hollow beam. It also did not come with any mounting brackets, only screws and molly bolts. Therefore we created a ledger board.
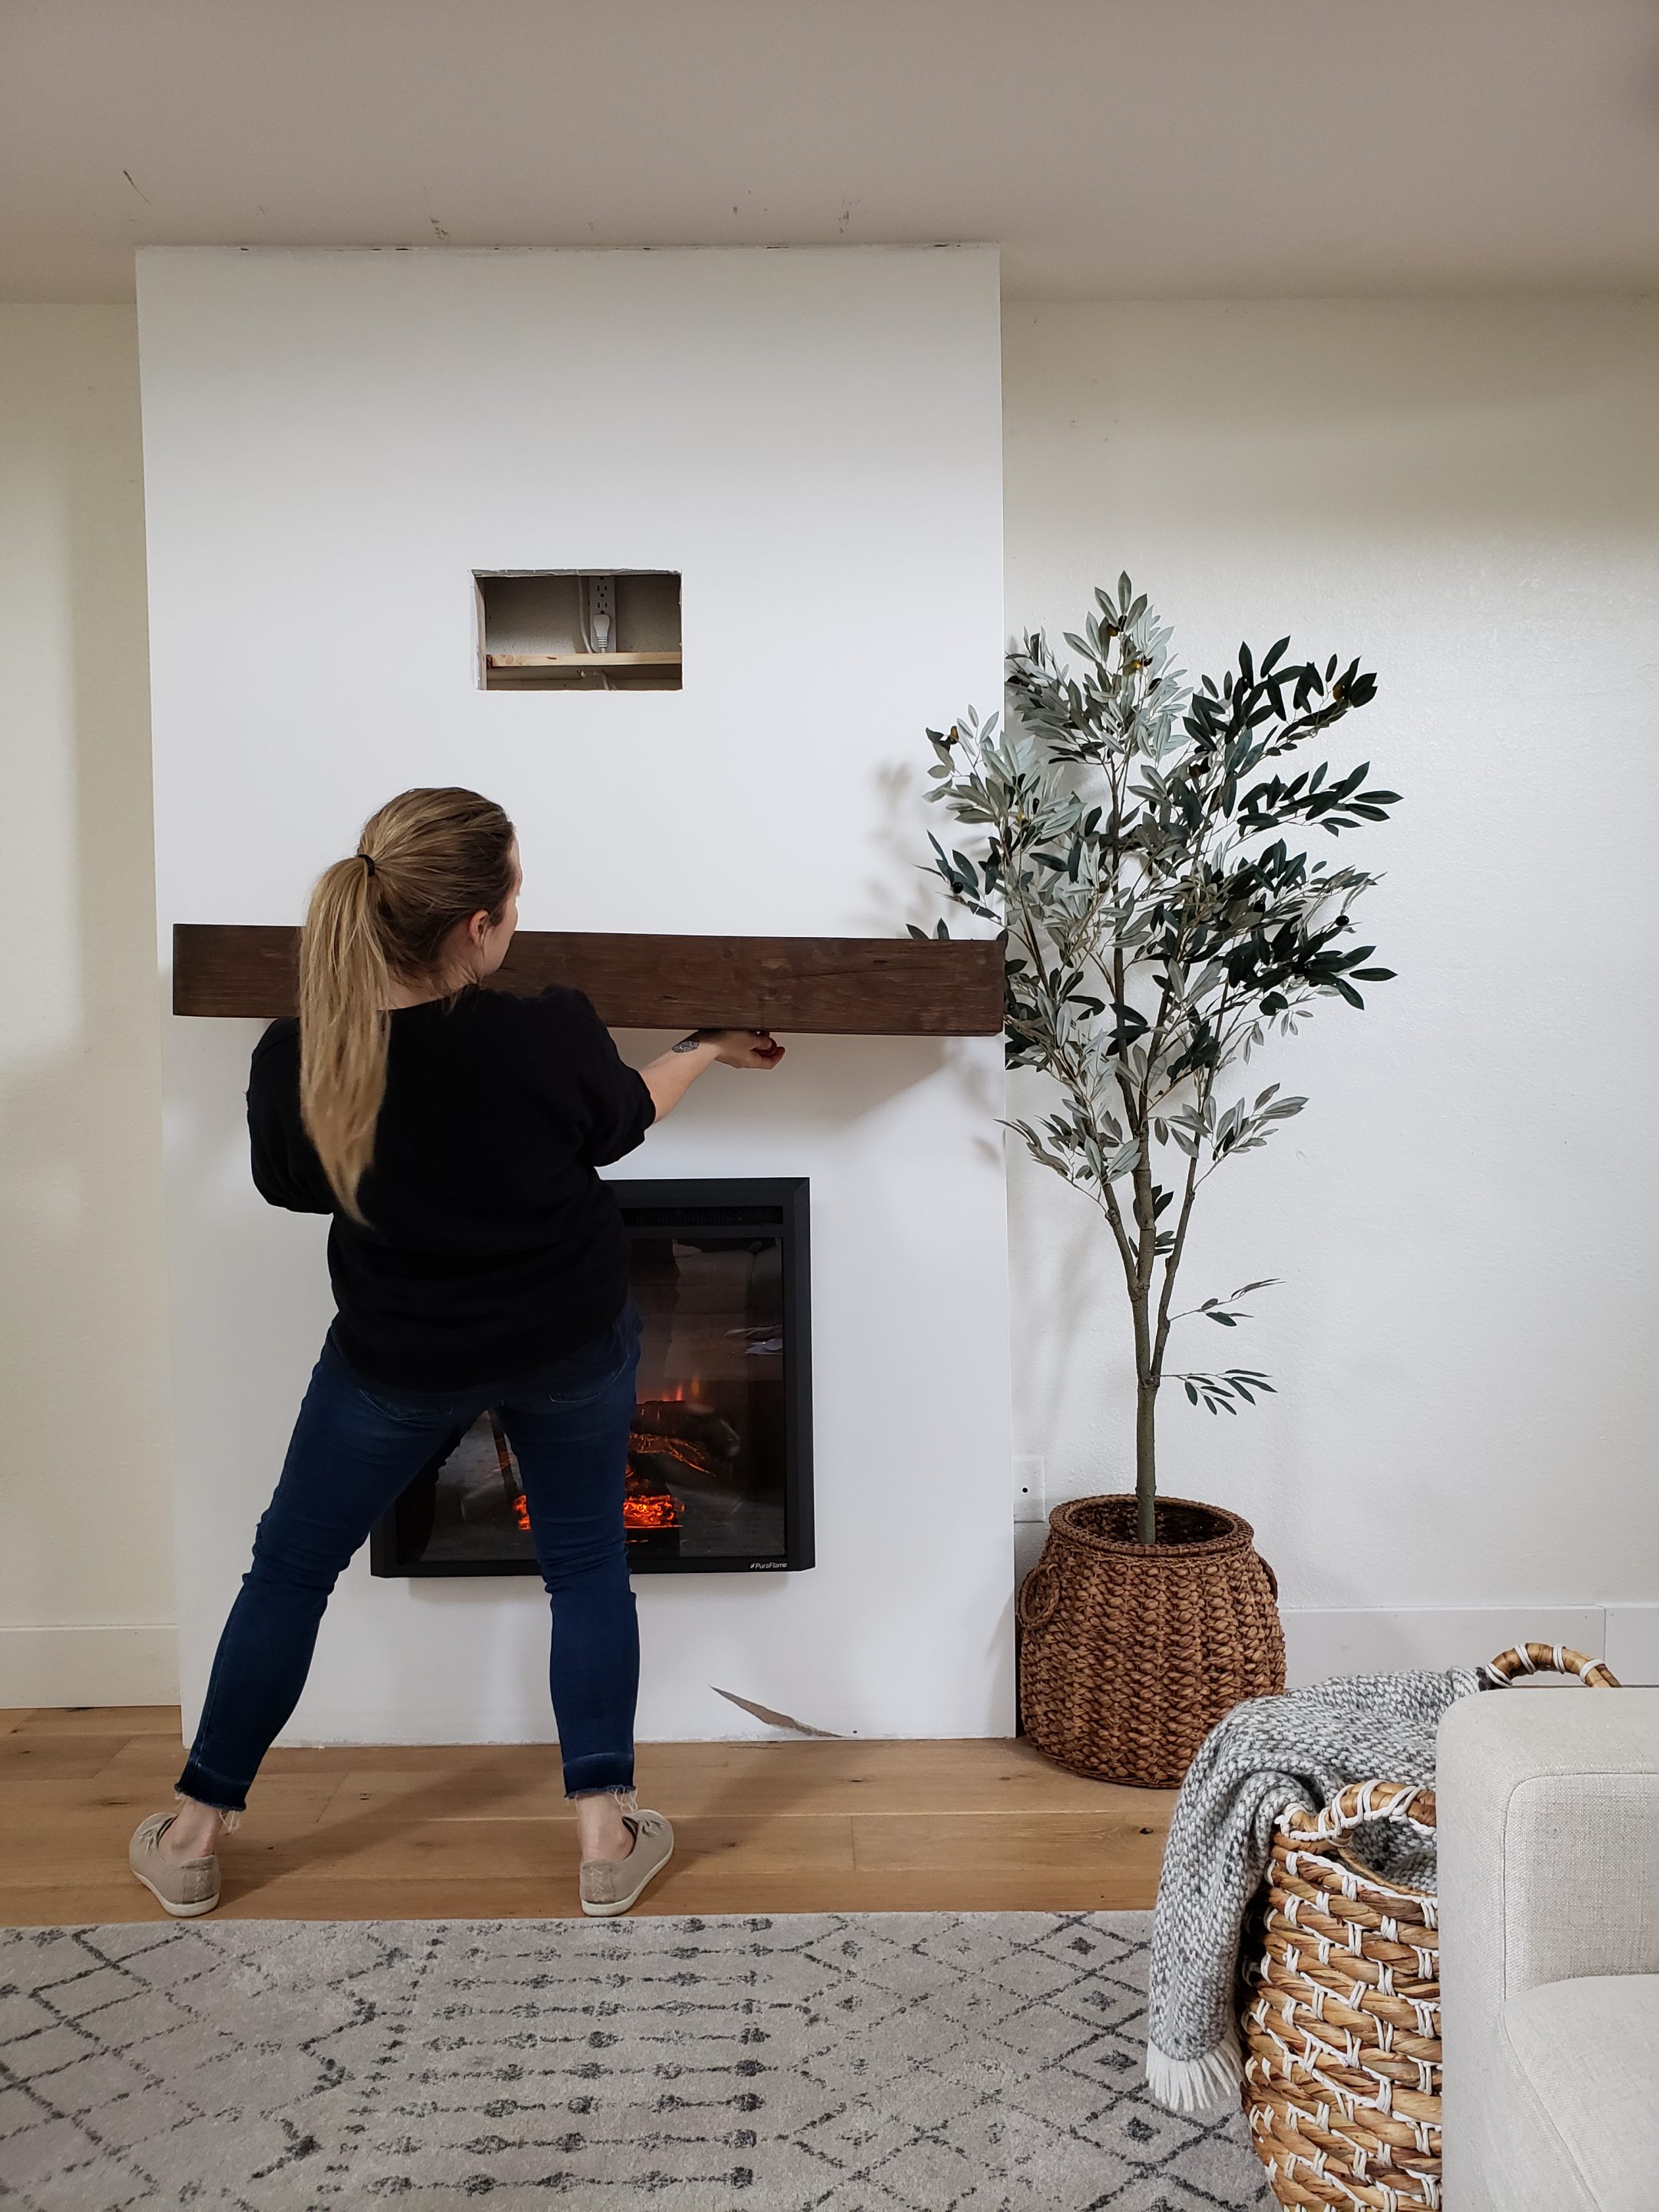
- ledger board- attach a 2×4 to face of surround 3/4 inch below where top of mantel would need to land. Mantel was 3/4 inch thick all the way around edges. Make sure 2×4 is level and centered and secure, no wobble to it.
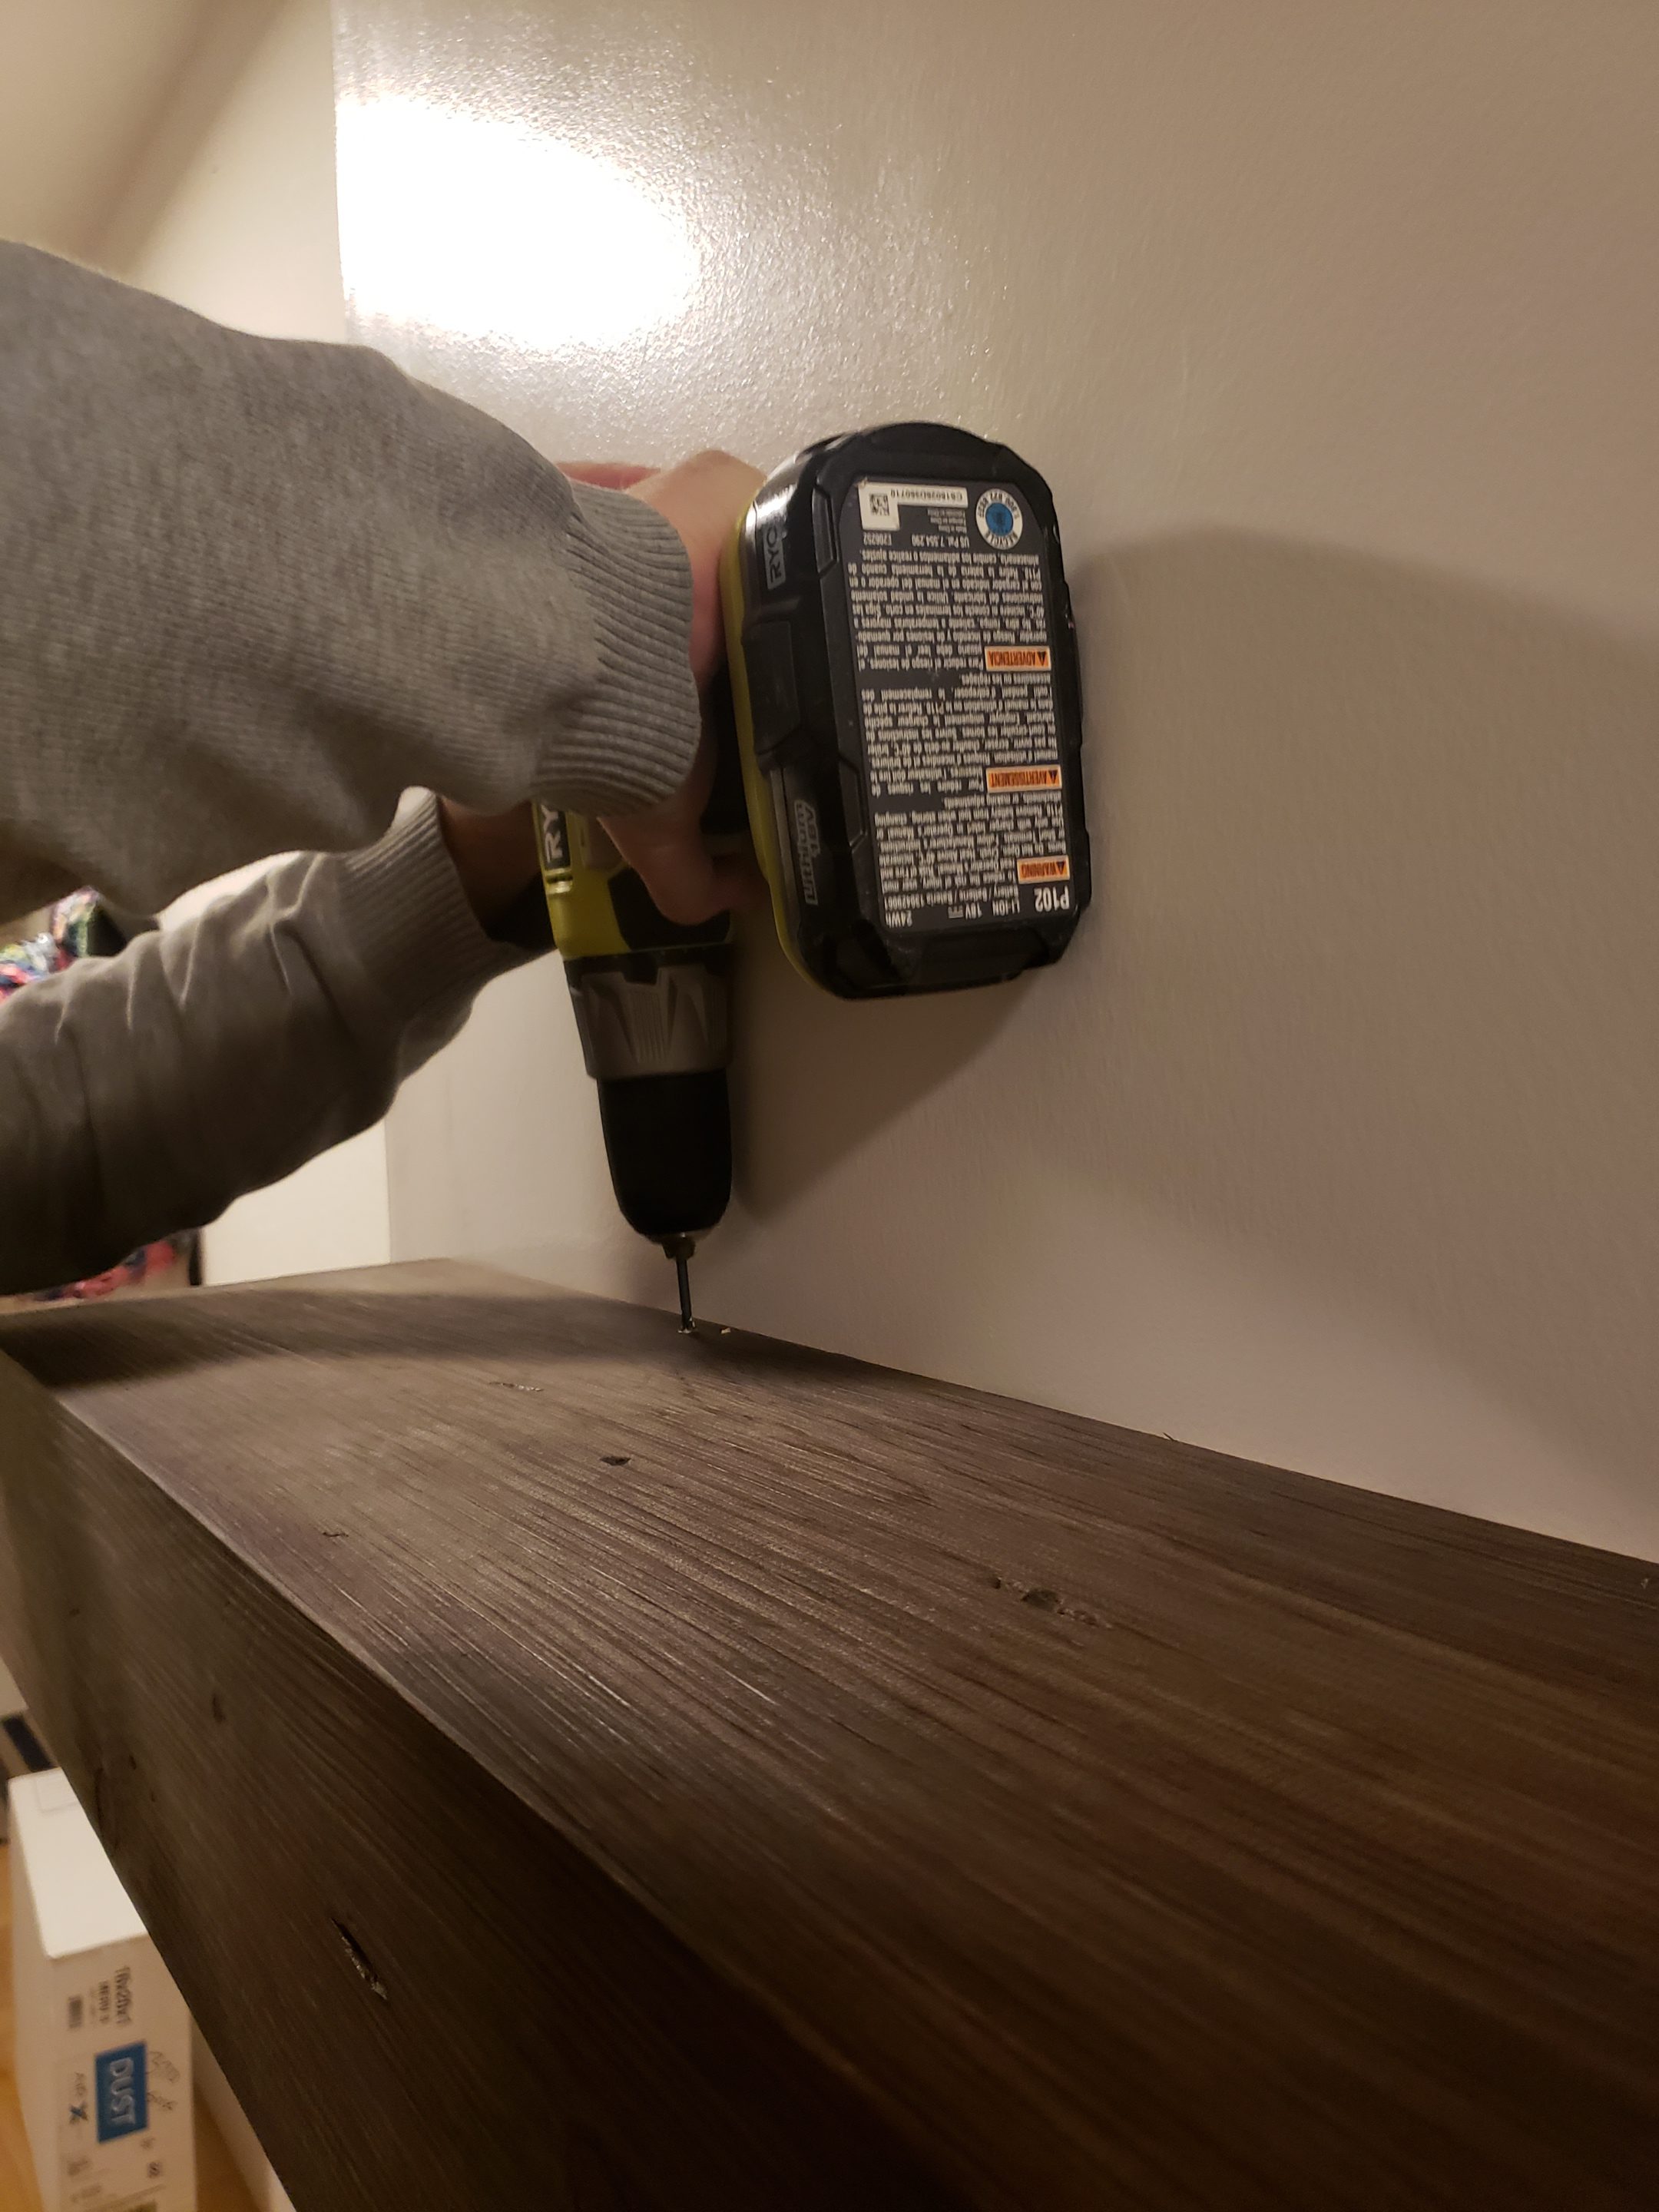
- Then take hollow core mantel and place over top of 2×4 screw into place from the top and bottom about 3/4 inch off the wall into the top and bottom of the 2×4 beneath. We used black 1 1/2 inch sheetrock screws for this because they hid well on the dark stain of our mantel. *The spacing between the insert and mantel is a matter of personal preference, we chose to place ours 9 1/4 inches above the insert.
- Next we put all of our components and wiring in place through the component cubby and set them up on the shelf inside the framing.
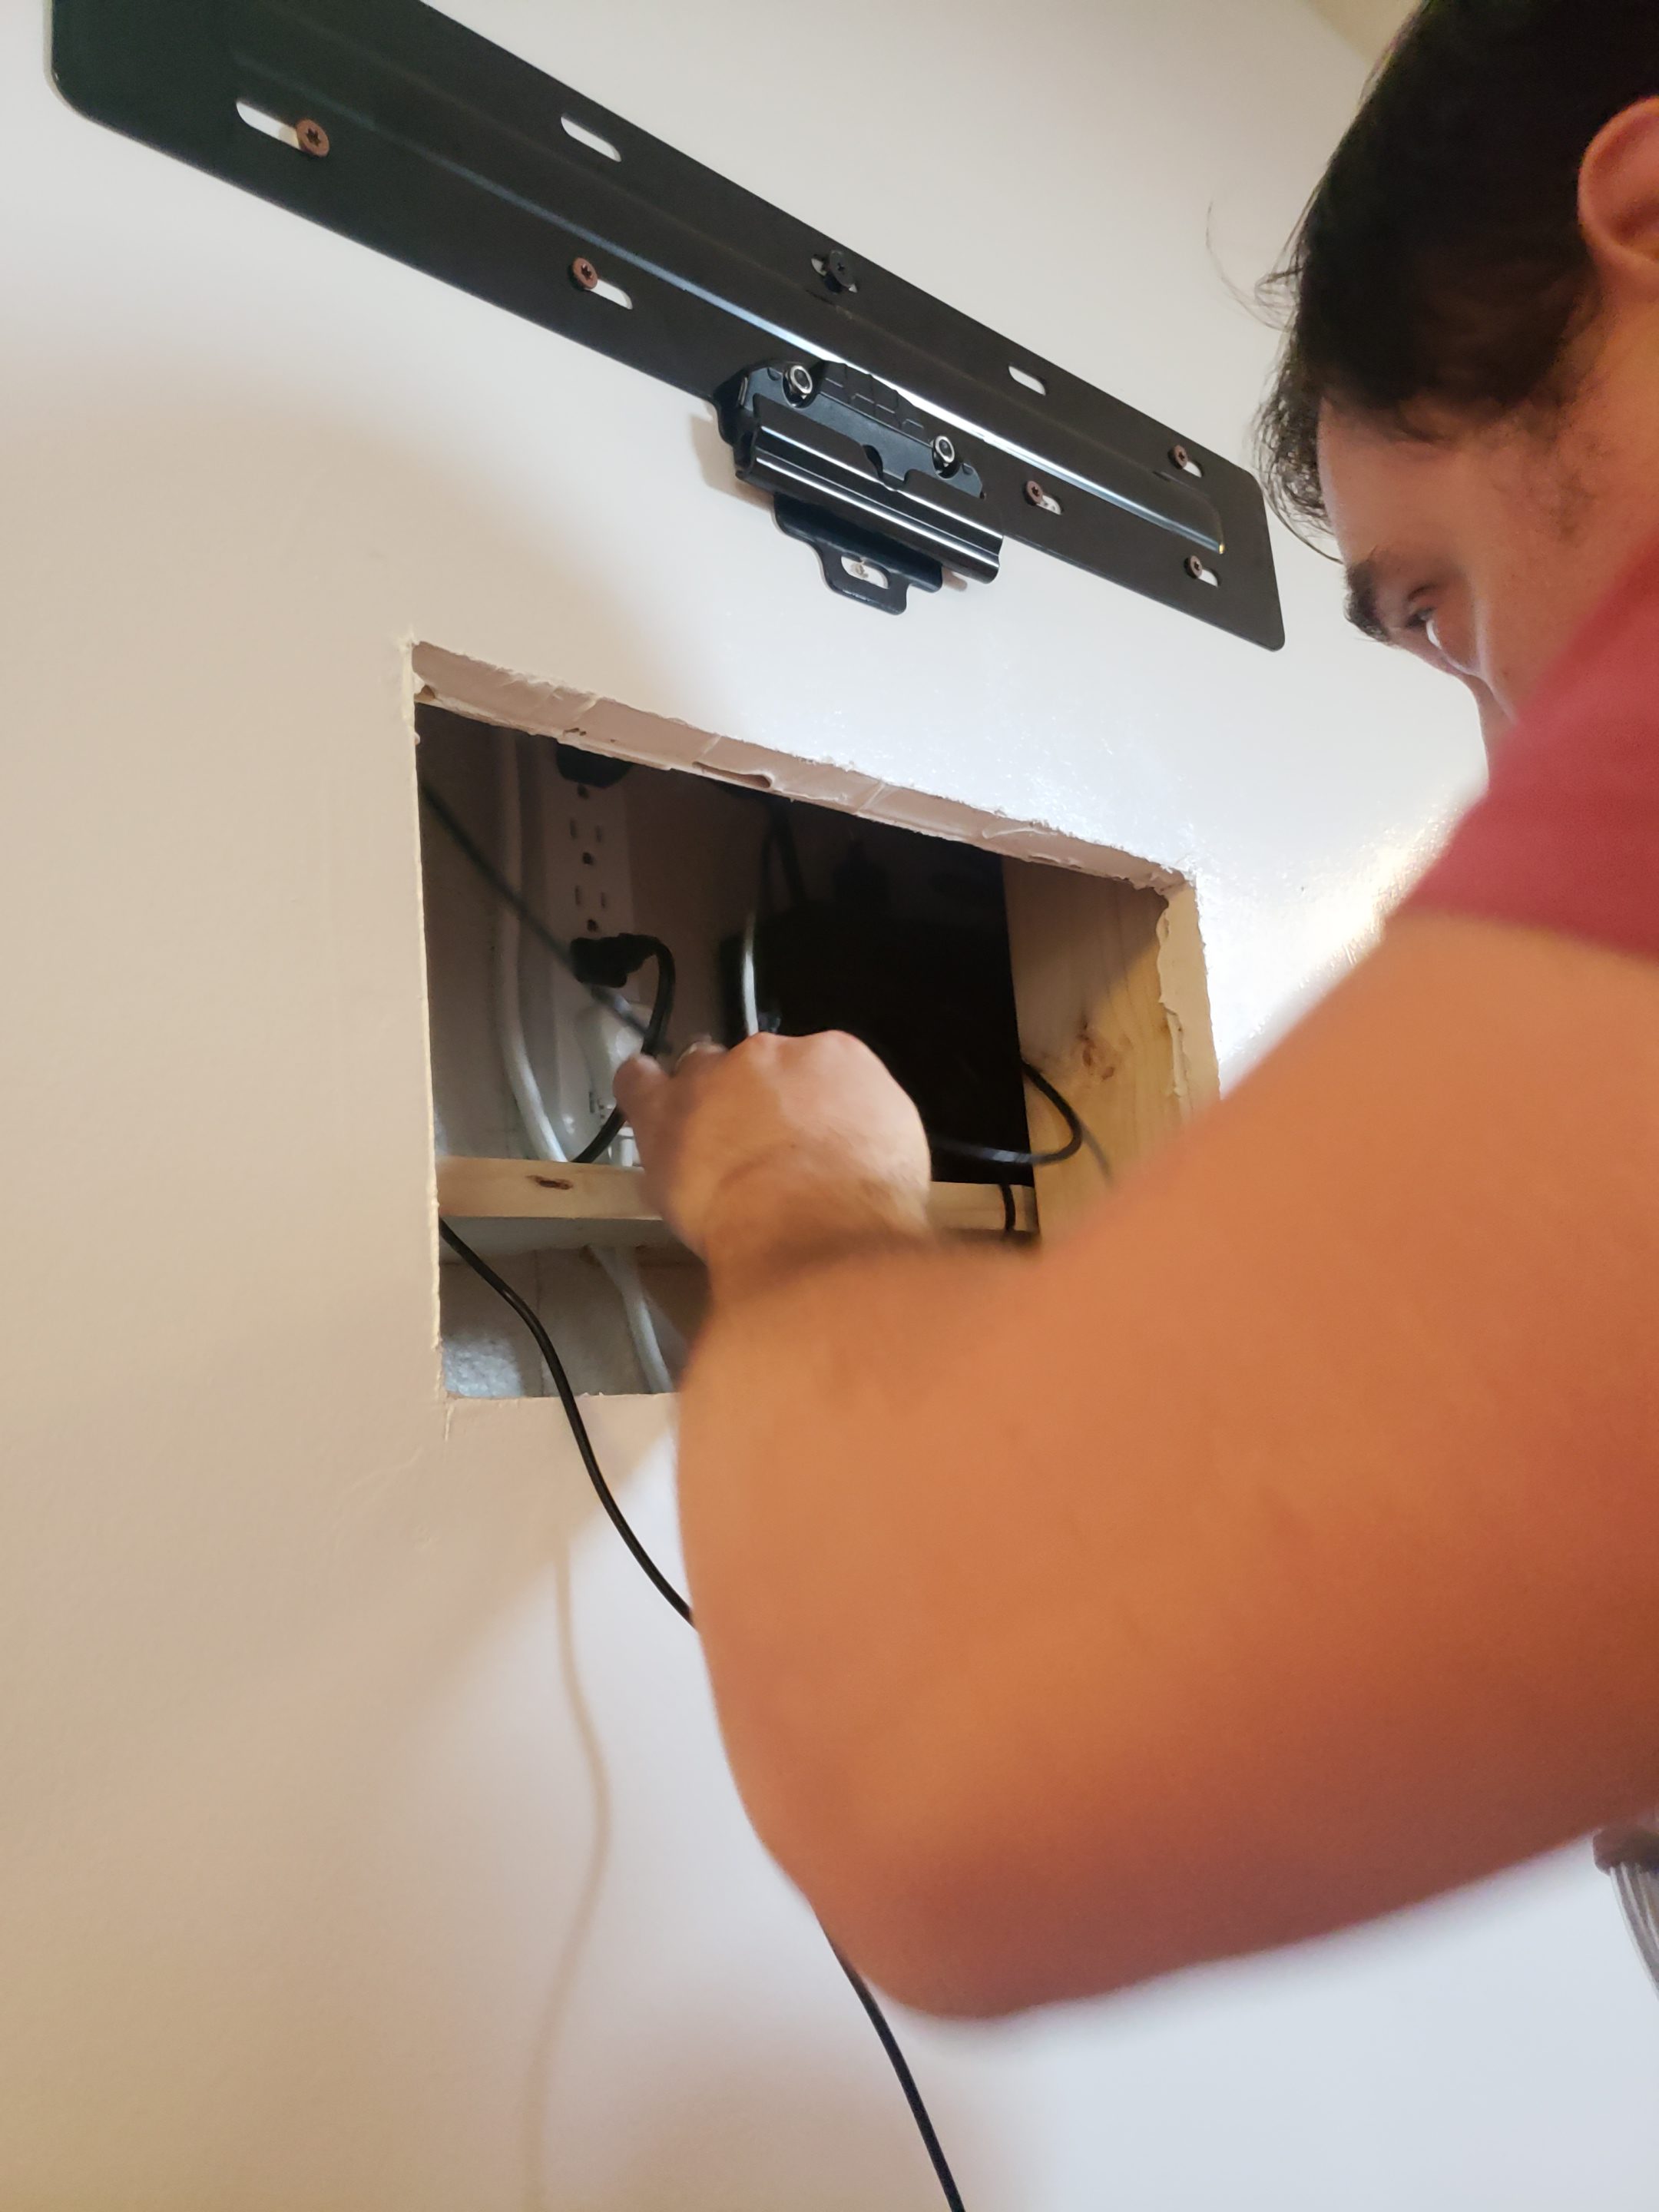
- We installed the TV mount and hung the Samsung Frame TV. The spacing between the mantel and the TV is also a matter of personal preference but we opted to place the TV 10 3/4 inches above the mantel.

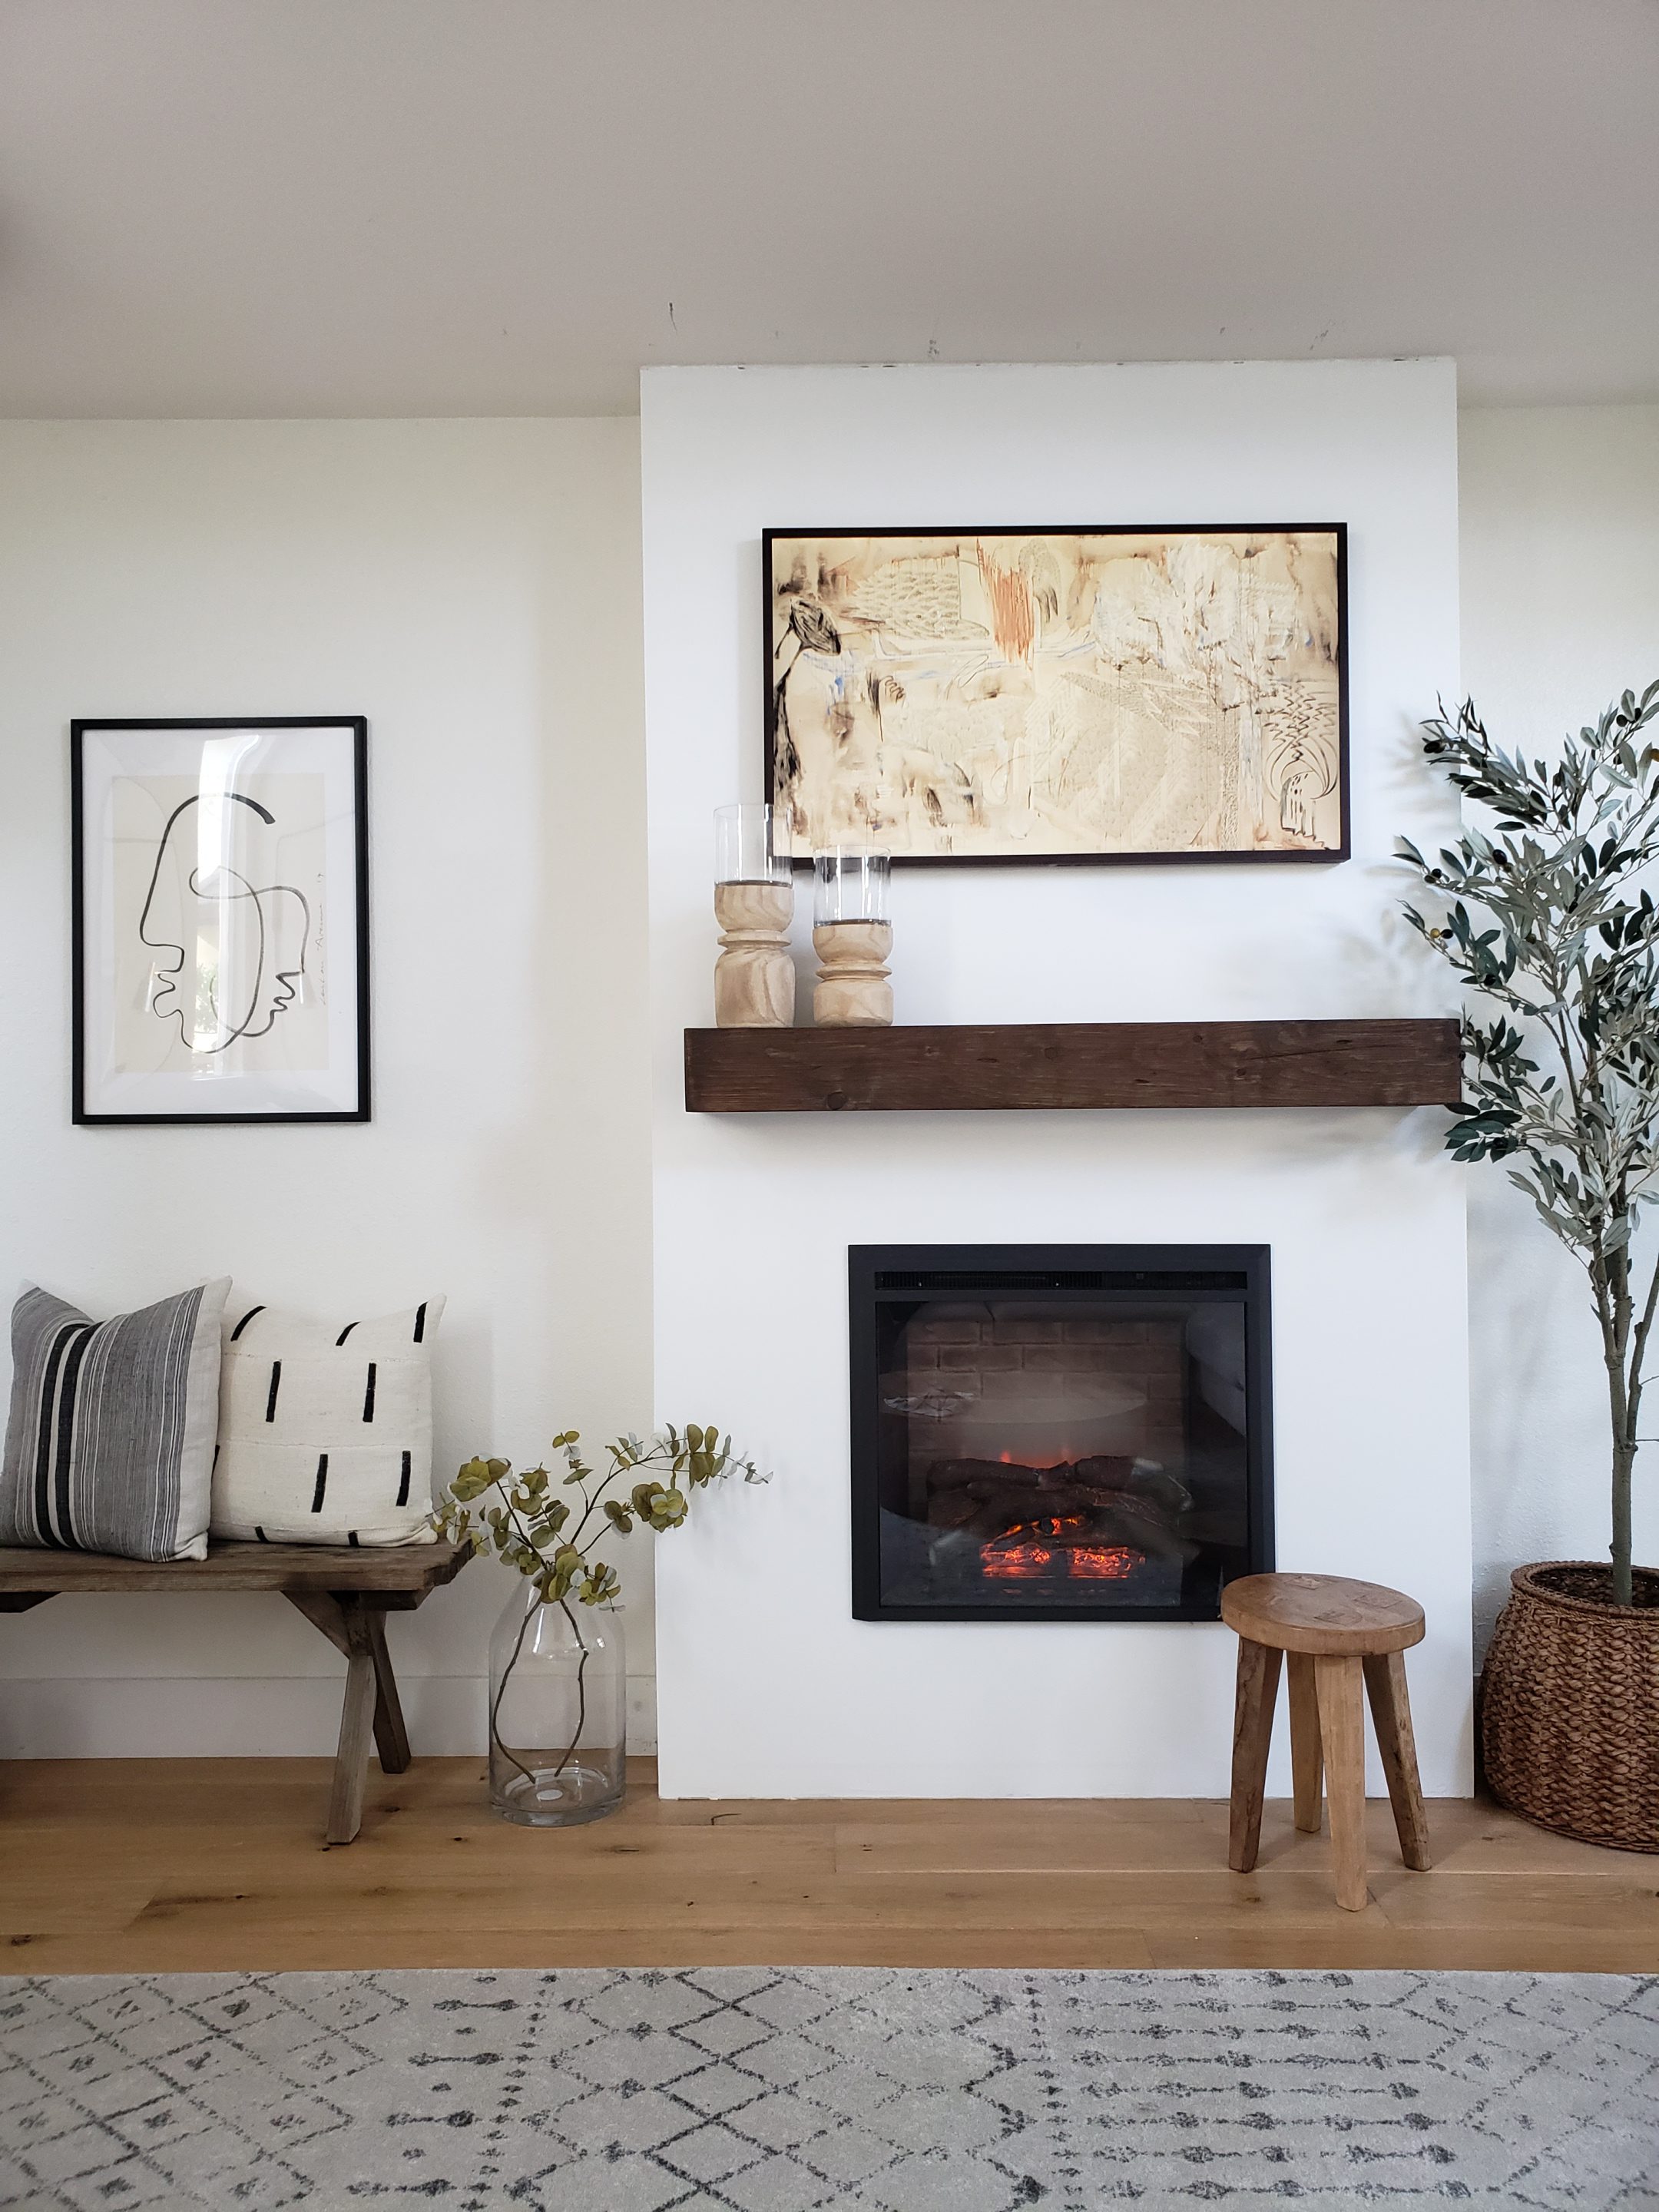
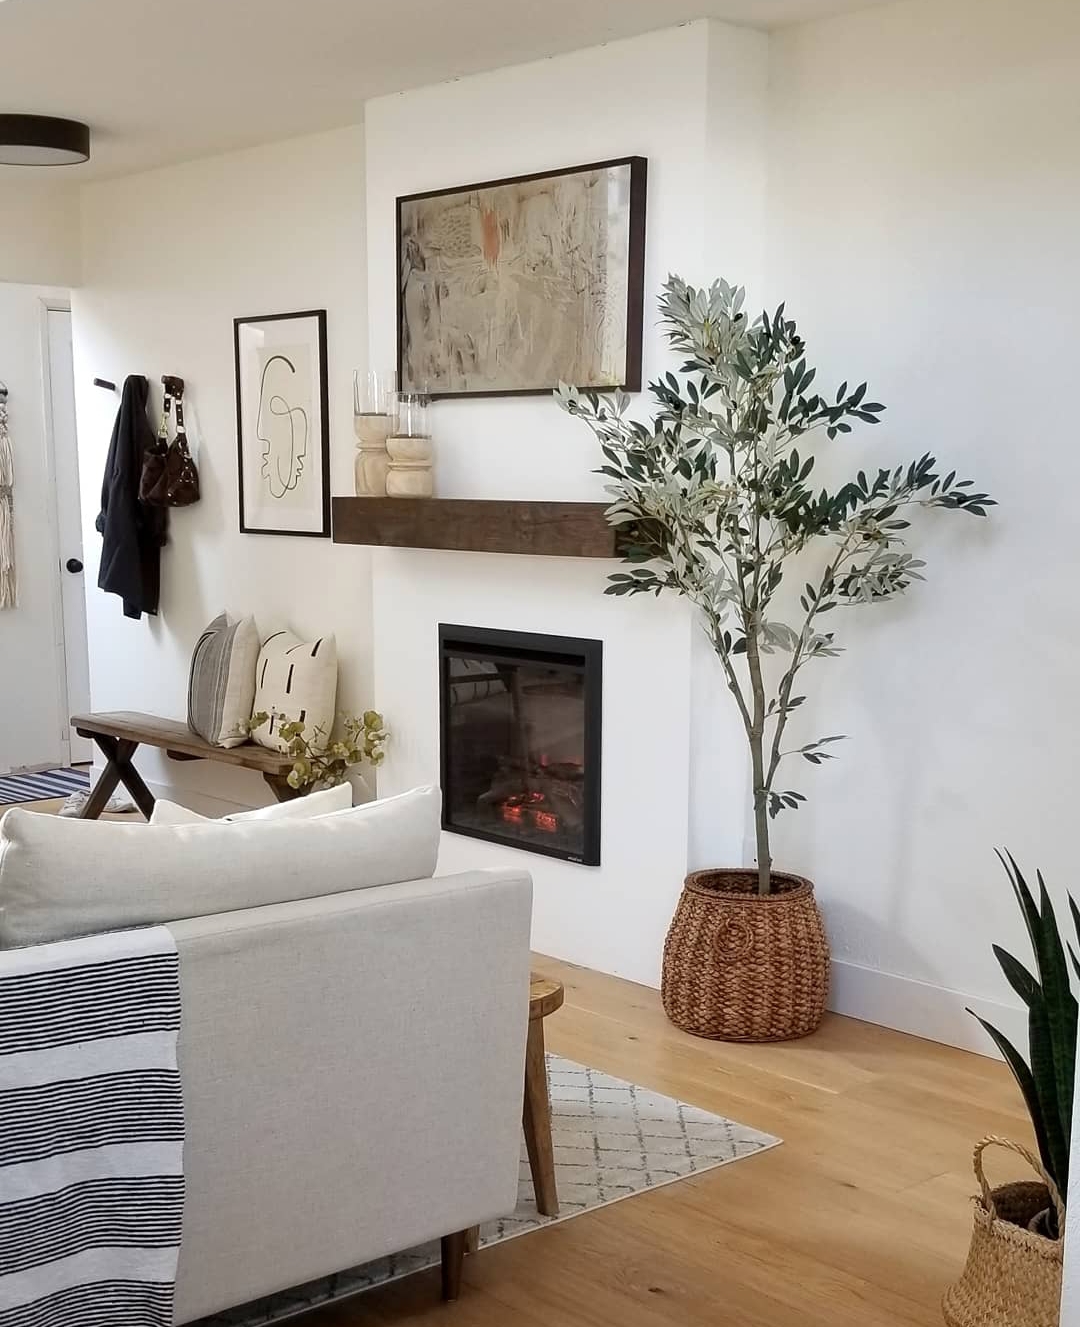
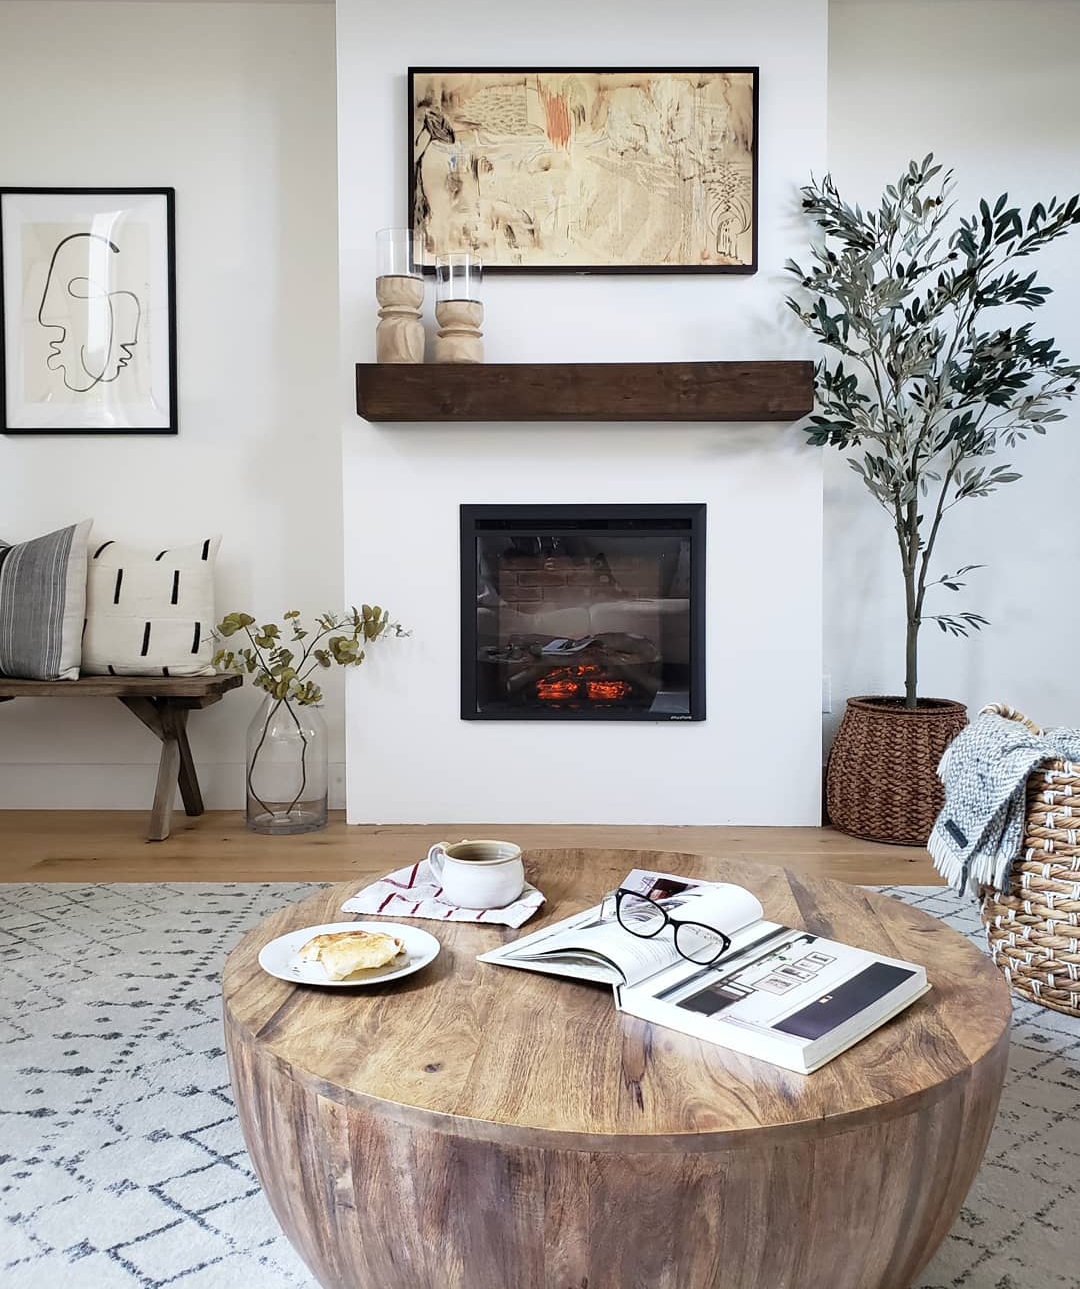
BOOM… INSTANT COZY FACTOR INCREASE!
We are so in love with how our DIY electric Fireplace turned out. Do you guys like it? Was this tutorial helpful? Did we leave anything out? Tell us in the comments and if you build your own DIY electric fireplace PLEASE share with me on Instagram @Kismet_House. I would LOVE to see them all!!! Happy building from me and my guy, who lets be real, did all the work.
